Basic Metal Working
Sourcing and Cutting
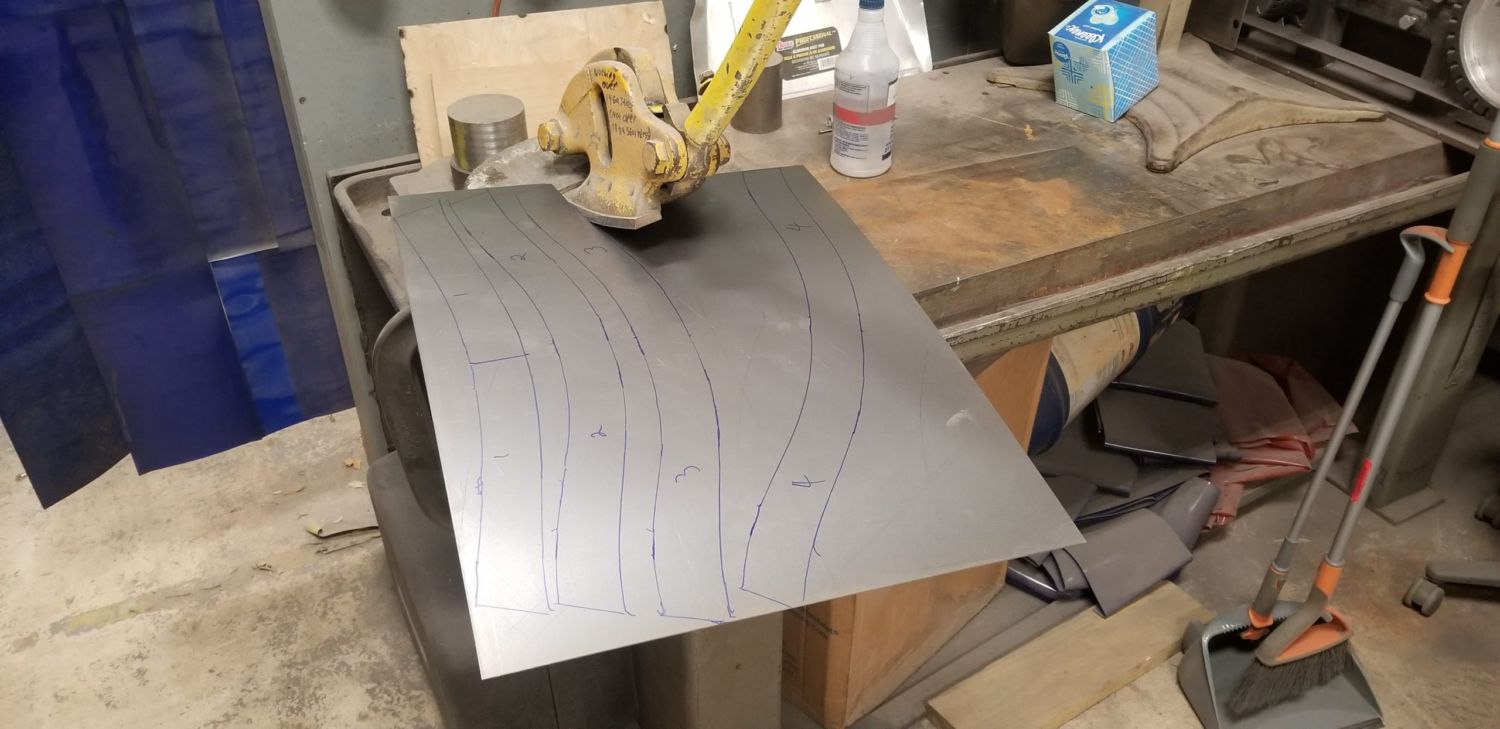
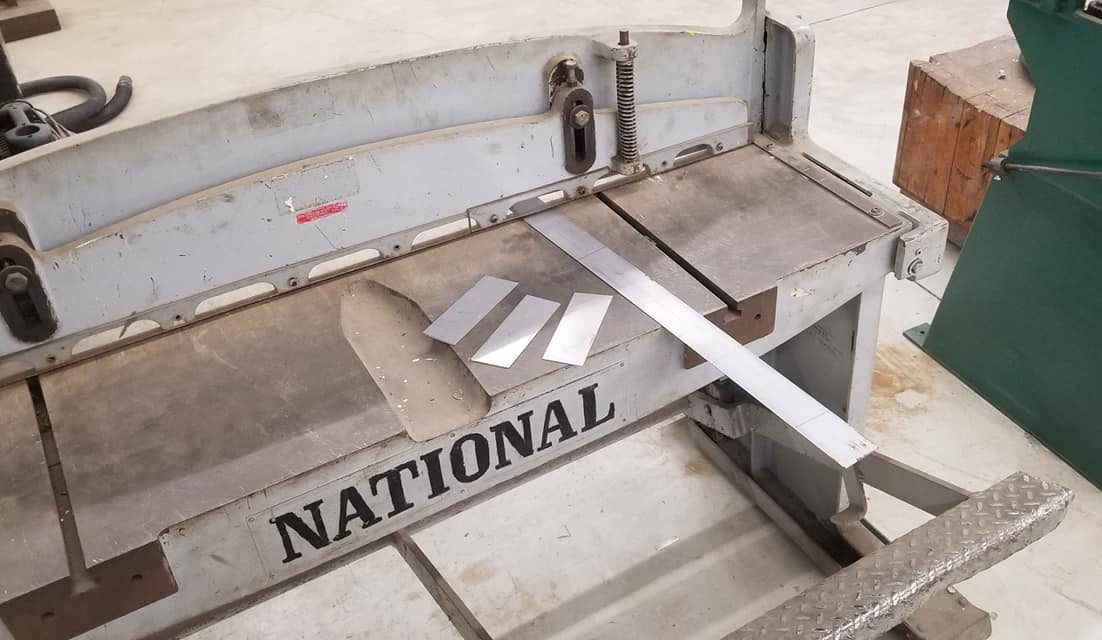
When starting out as a beginner, I actually recommend using thicker rather than thinner steel; such as cold rolled mild 16ga (1.6mm) steel (you can read more about period materials here) for larger armor pieces. I understand that it seems counter intuitive, but working with thicker steel can actually be easier in the long run. 18ga (1.2mm) can be used but I absolutely would not go any thinner, except for items like sode and kusazuri/gessan. I don’t recommend purchasing steel from retail stores, such as Home Depot. Not only are the prices too high, but it also seems like the steel is not annealed (softened) properly for easier forming. Try to find a local metal supplier to purchase directly from. Uusually these companies will often cut the sheets to a manageable size for a small fee. Onlinemetals.com is a good source for steel if there is no supplier in your area. I typically order steel from them cut into shapes close to the final piece, such as really long (like 60″ x 2″) strips for use in other armor parts, like sode. I’ll then use a big shear to chop the long strips into their final lengths in just a few minutes. (picture below)
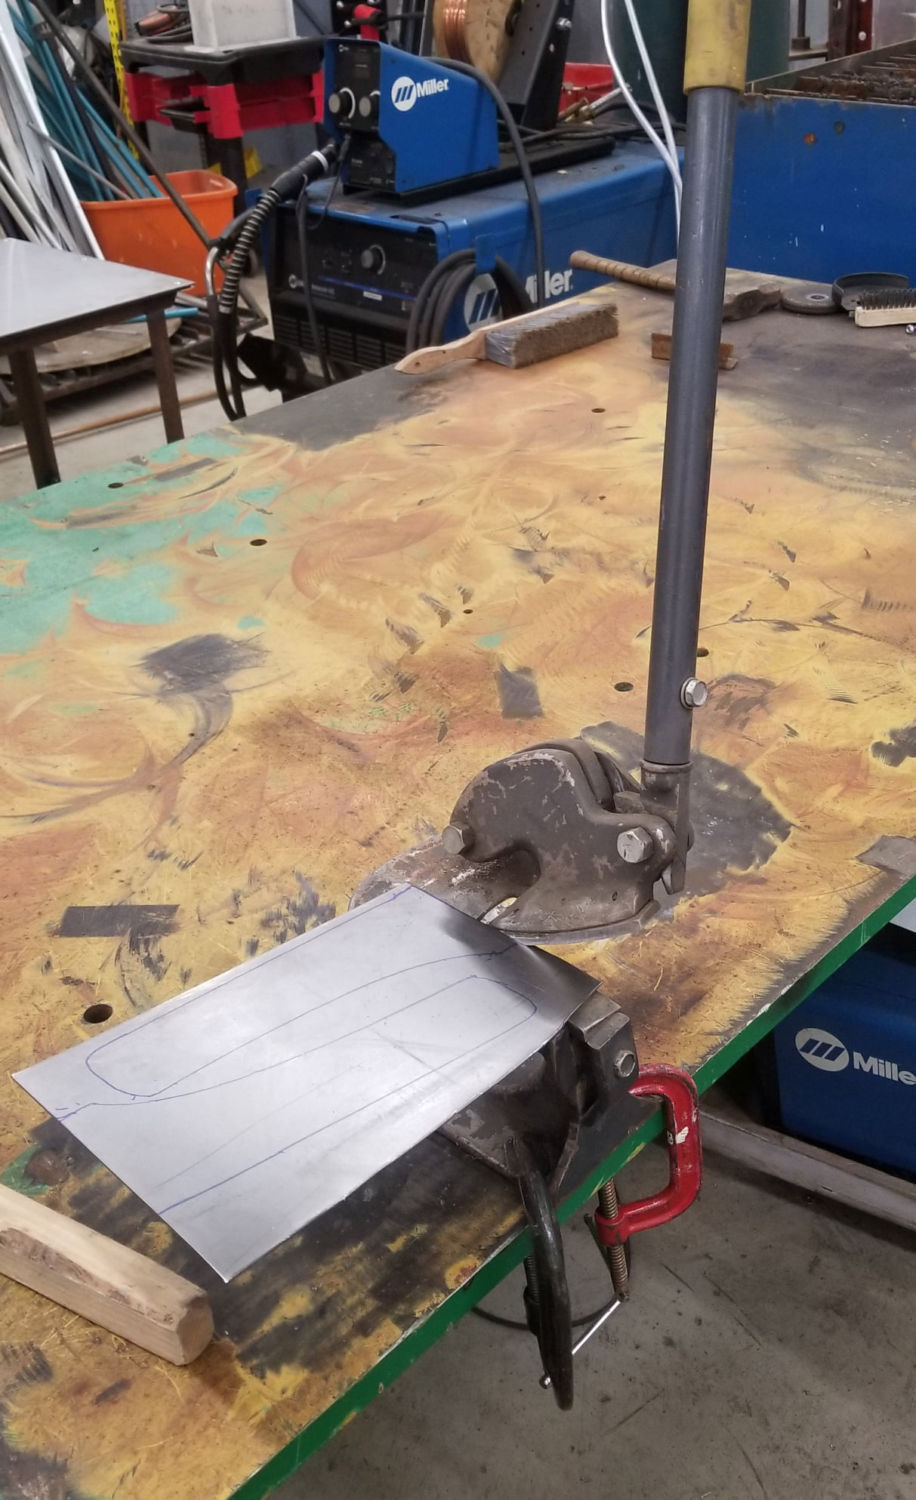
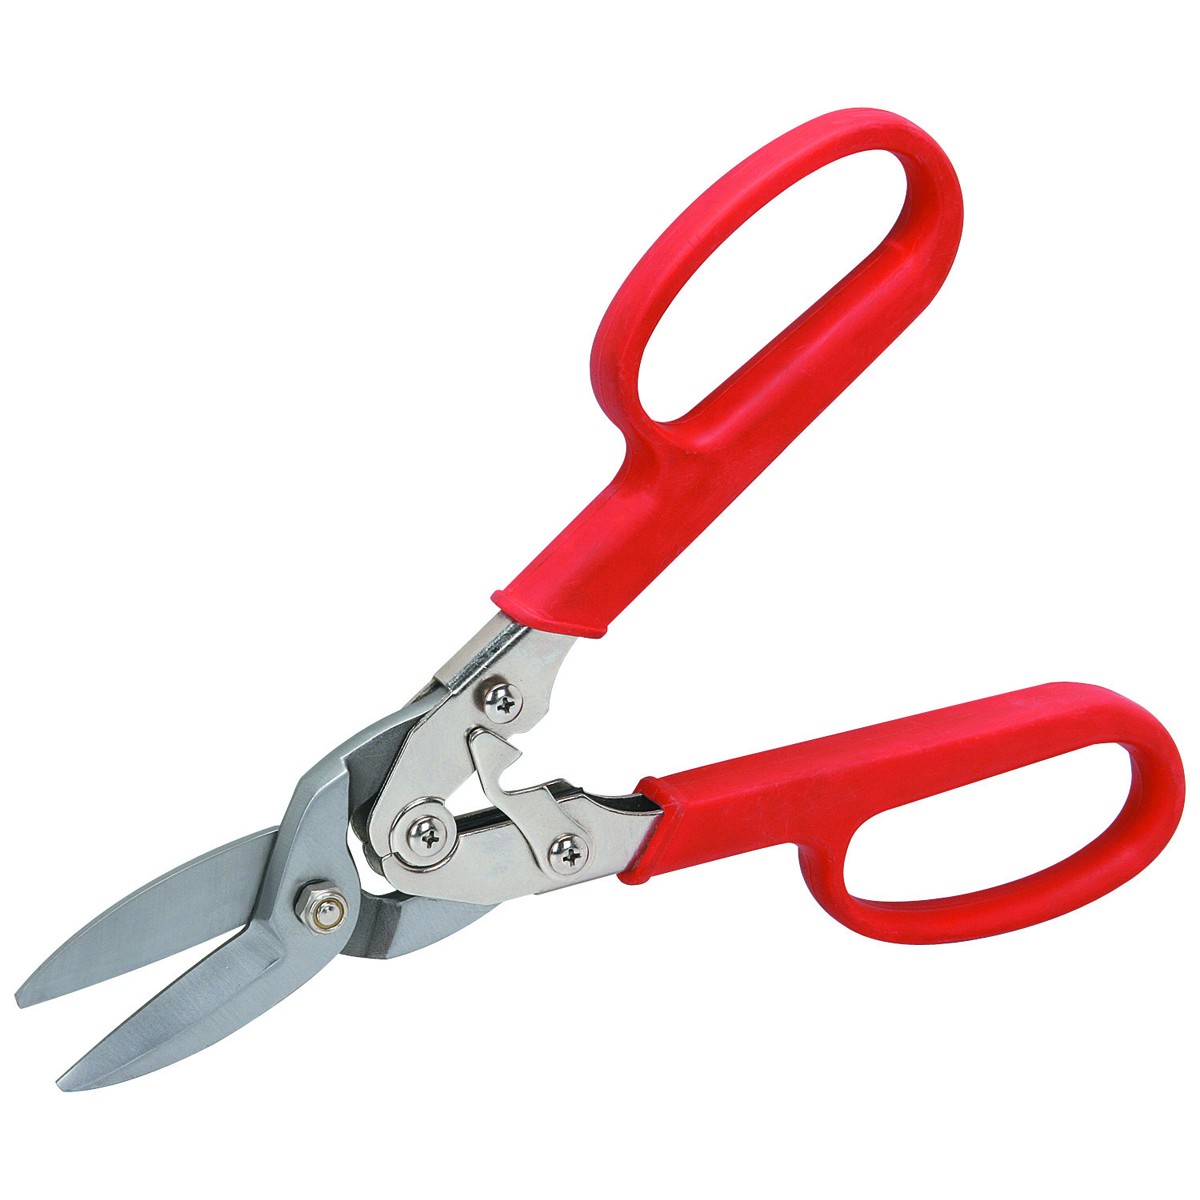
When it comes to cutting steel for armoring, I find the best tool is a throatless shear (Pictured above). Harbor freight (a budget hardware store in the USA) sells a cheaper one that works just fine, and is well worth the investment. Powered sheet metal shears are another good option when on a stricter budget. The next step down in quality of cut ease of use would be an orbital jigsaw with the appropriate blades. Finally, if none of the other tools can’t be used for whatever reason, there are hand shears/snips. I don’t recommend these for thicker steel as the required muscle, sweat, blood, and tears aren’t worth the mediocre cut obtained. Safety tip when cutting; Be sure to always wear eye/ear protection and follow up any cuts with a bit of sanding to remove any razor sharp edges.

Shaping
The first thing to understand when learning to shape metal is that despite its heavy and hard nature, metal is quite soft and pliable when the correct forces are applied. In this guide we’ll be taking a look at three of the most basic techniques when beginning the armoring hobby, Curling, dishing, and planishing. With these 3 skills mastered, nearly all types of armor pieces can be constructed with minimal equipment. Be sure to click the red text for links to tutorial videos.
Hammer Curling
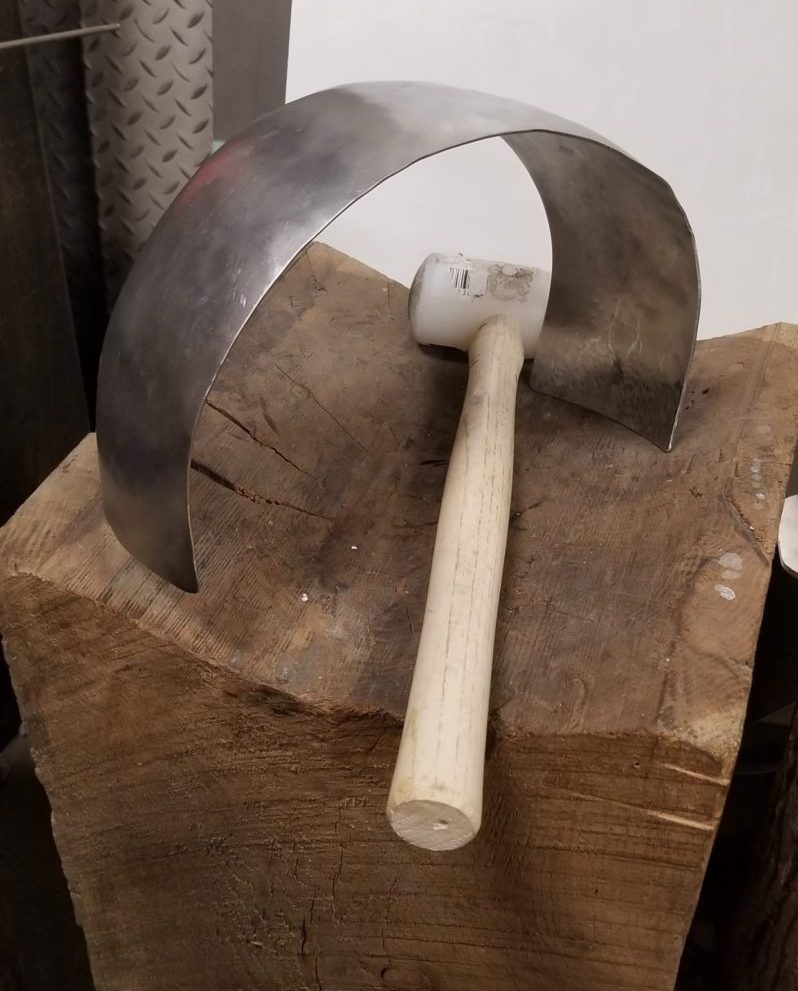
Its relatively easy to figure out how to take a flat piece of metal and curl it up in a single dimension into a tube. It behaves just like any other flat objects that we are used to, such as a sheet of paper. The difficultly lies in applying the necessary leverage evenly such as when curling the edge vs the center of a piece. Or perhaps the metal is not evenly thick and some sections bend more readily than others creating a wavy and uneven pattern. Its then necessary to have two hard surfaces to smash the metal in between to coax it into the desired shape. There are 3 methods for curling, each with their own pros and cons:
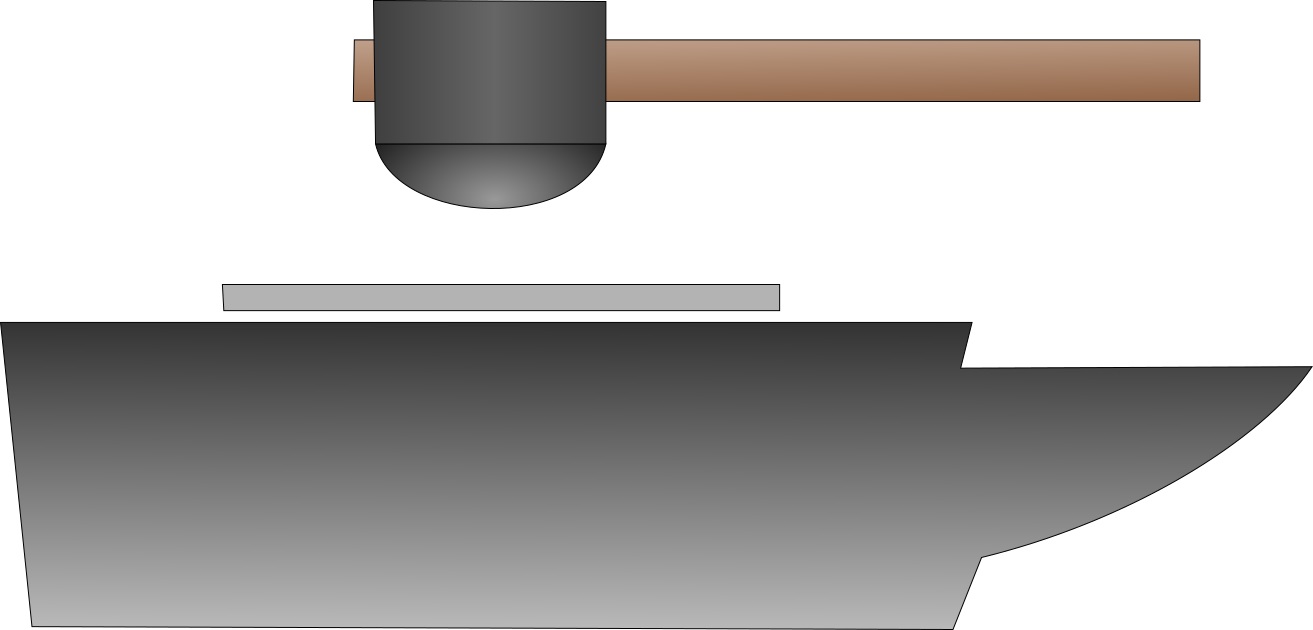
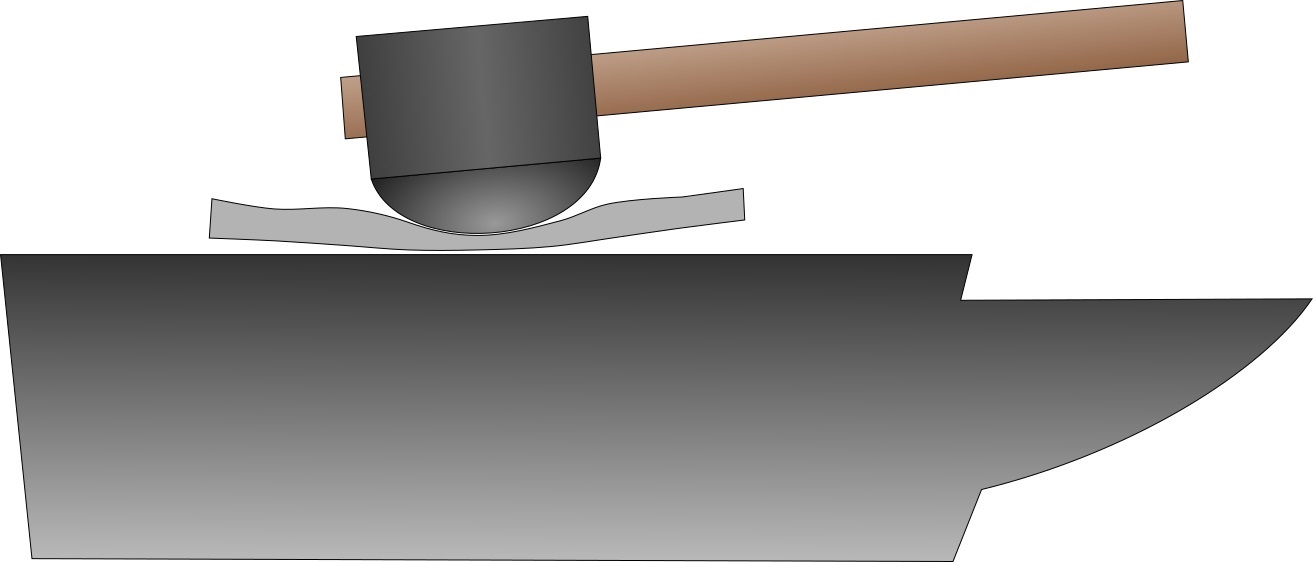
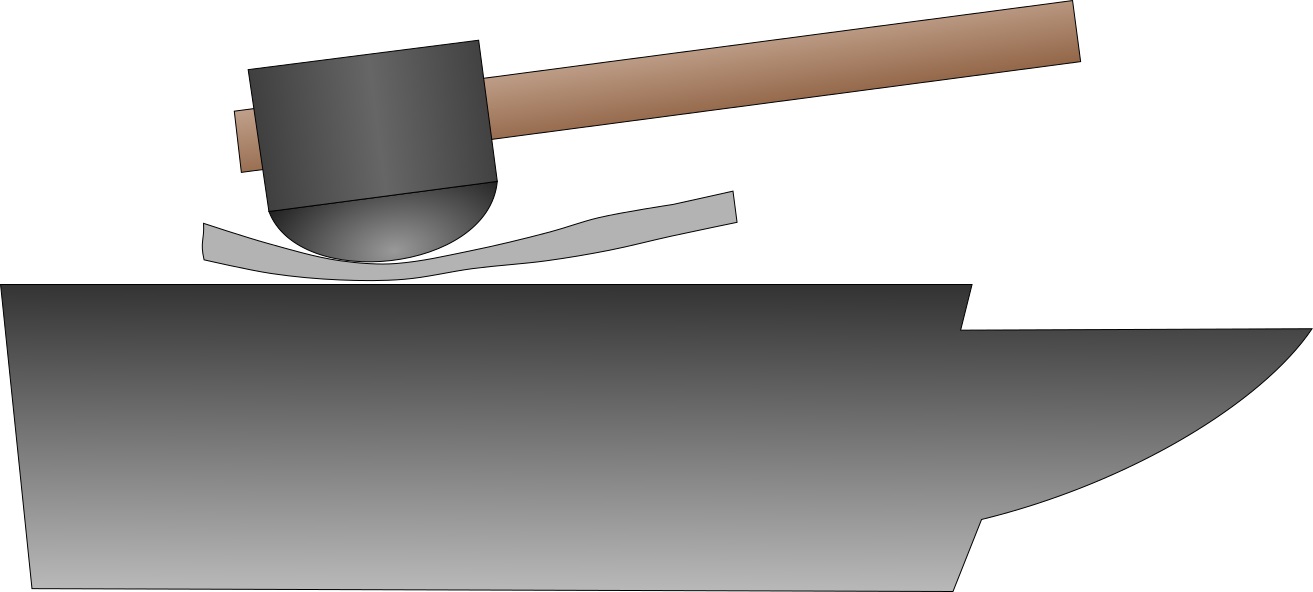
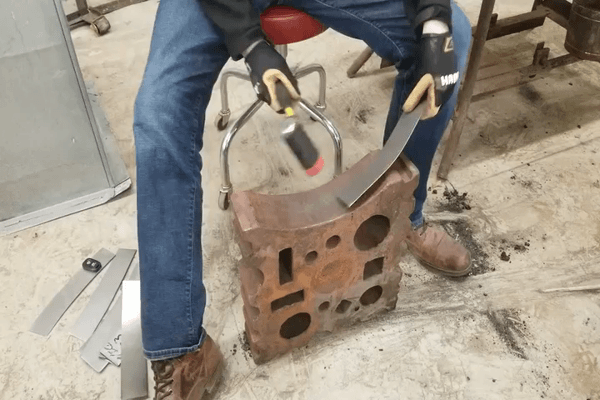
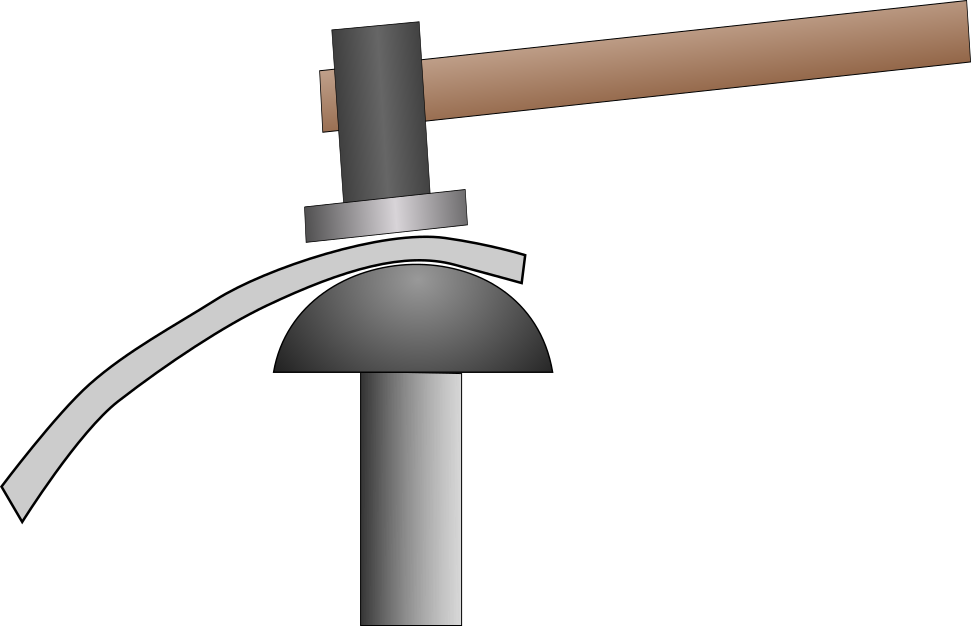
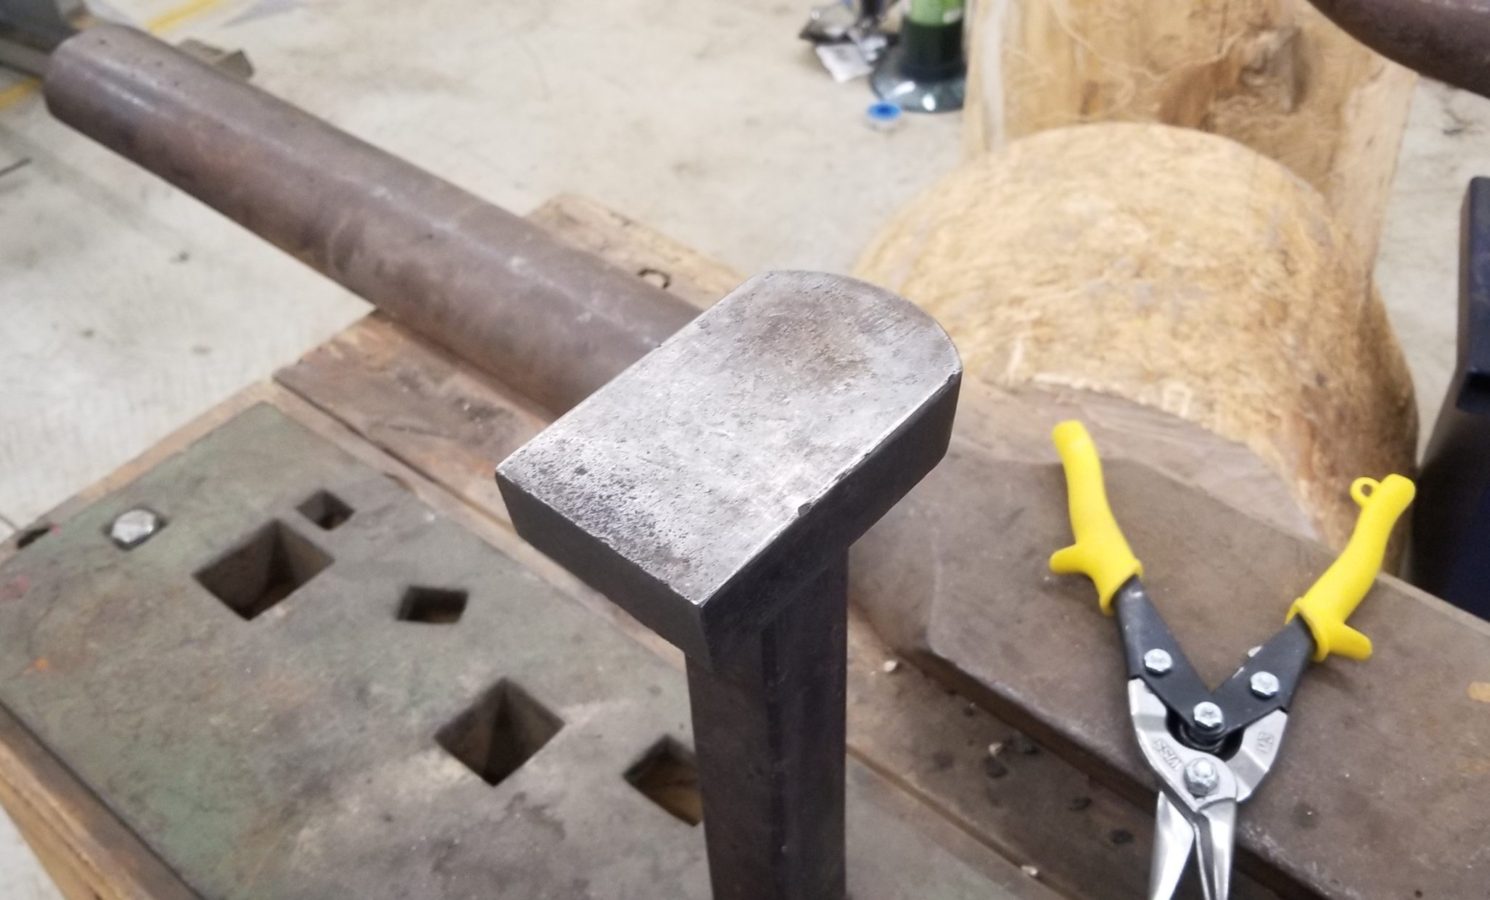
First (and probably best) is called hammer curling. Its very basic, the process consists of striking the metal along the axis in which you want to curl it with an oval hammer onto a flat anvil. This dents the metal, thinning it in spot where the hammer, metal, and anvil came in contact. This process pushes the metal outward from the hit, and since it can’t go down into the anvil, it rises outwards in all directions. With enough strikes, the oval shape of the hammer will curl the pieces in the desired dimension. This technique is effective because it can be used for pieces of all sizes and shapes, providing your anvil and hammer are big enough. Additionally it is easy to get right to the edge of the piece, and has the benefit of hardening the steel (a bit) as you go. When hammering, be sure practice landing your blows in a consistent row with a bit of overlap between hits and rows (see example below). Here is an excellent demonstration: IronCrown Workshop. The downside is that it creates a dimpled surface that needs to be planished and sanded smooth again.


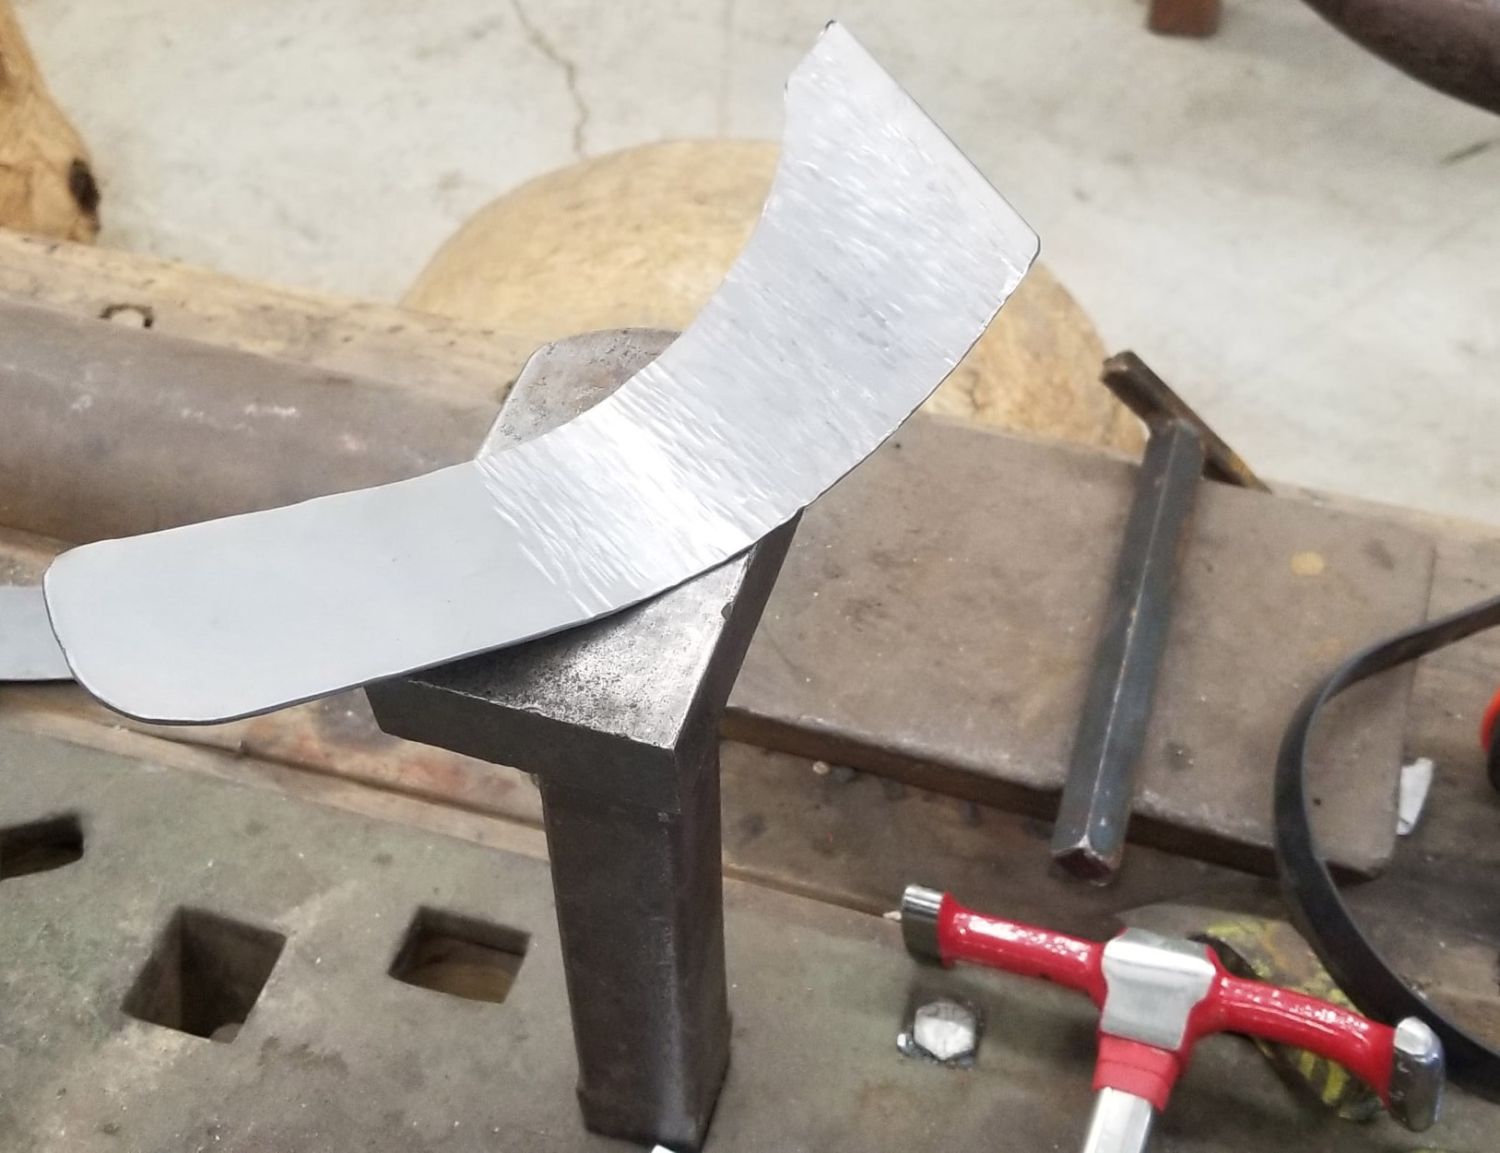
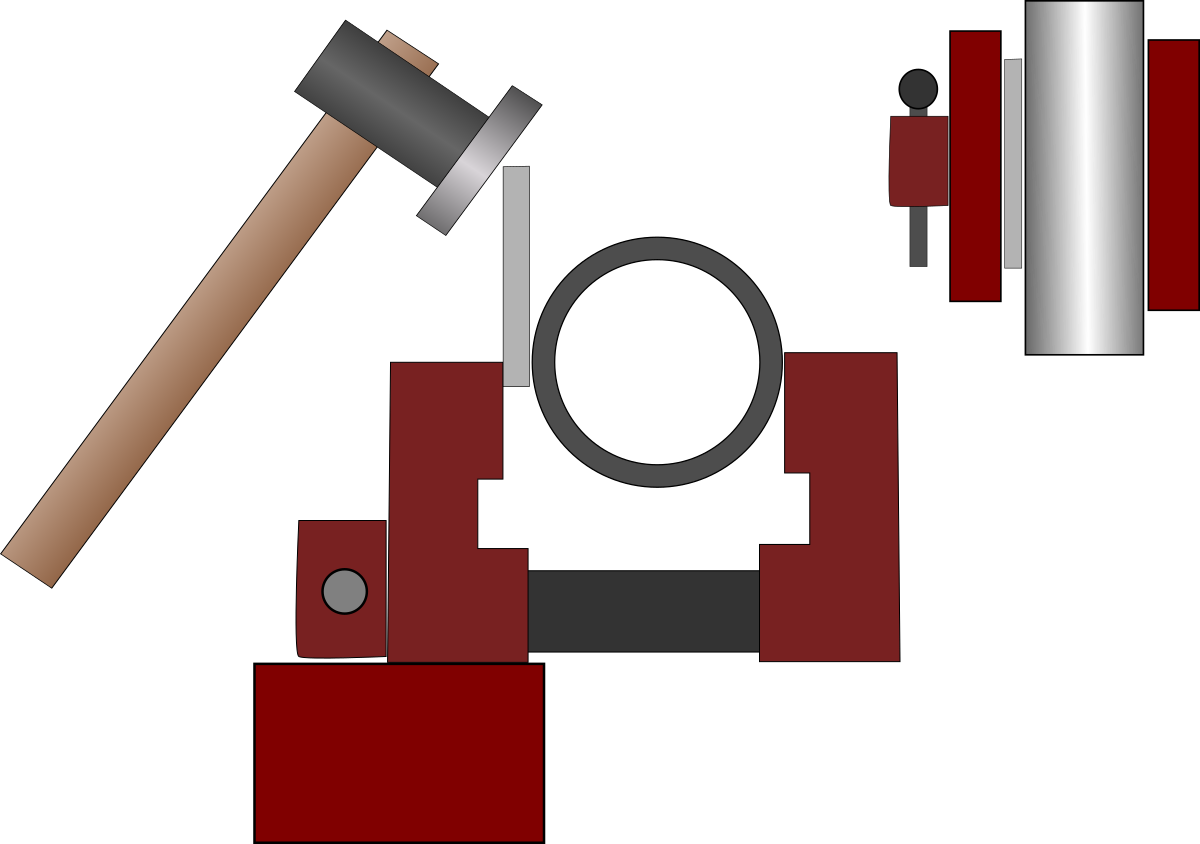
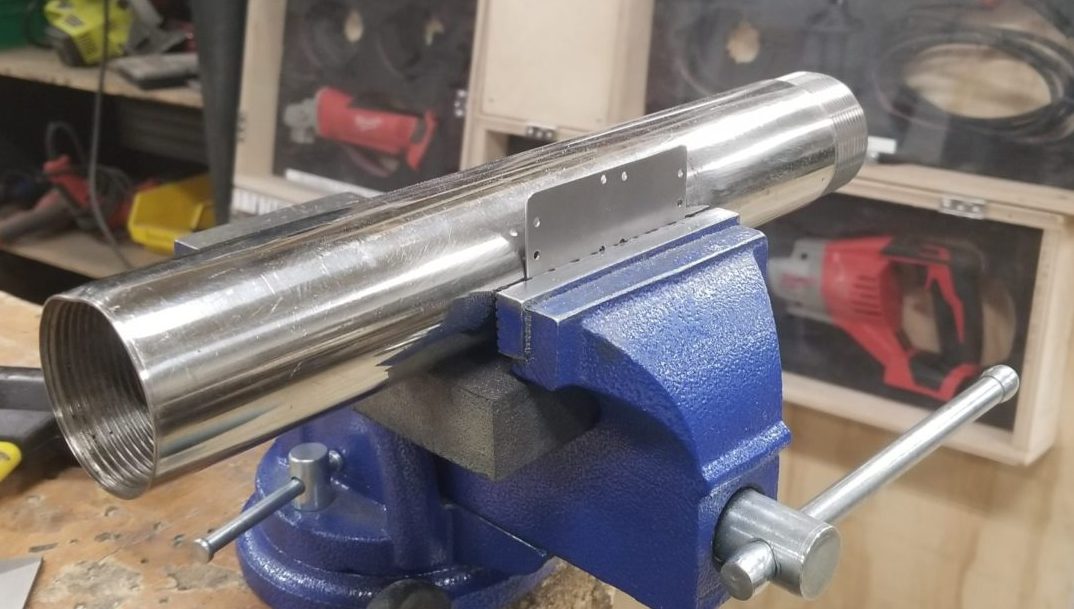
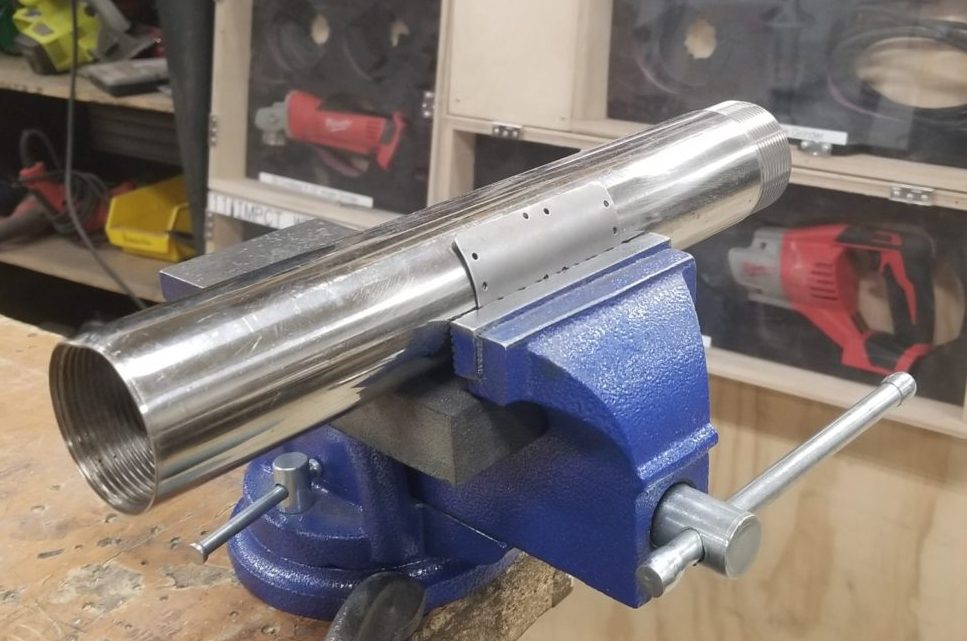
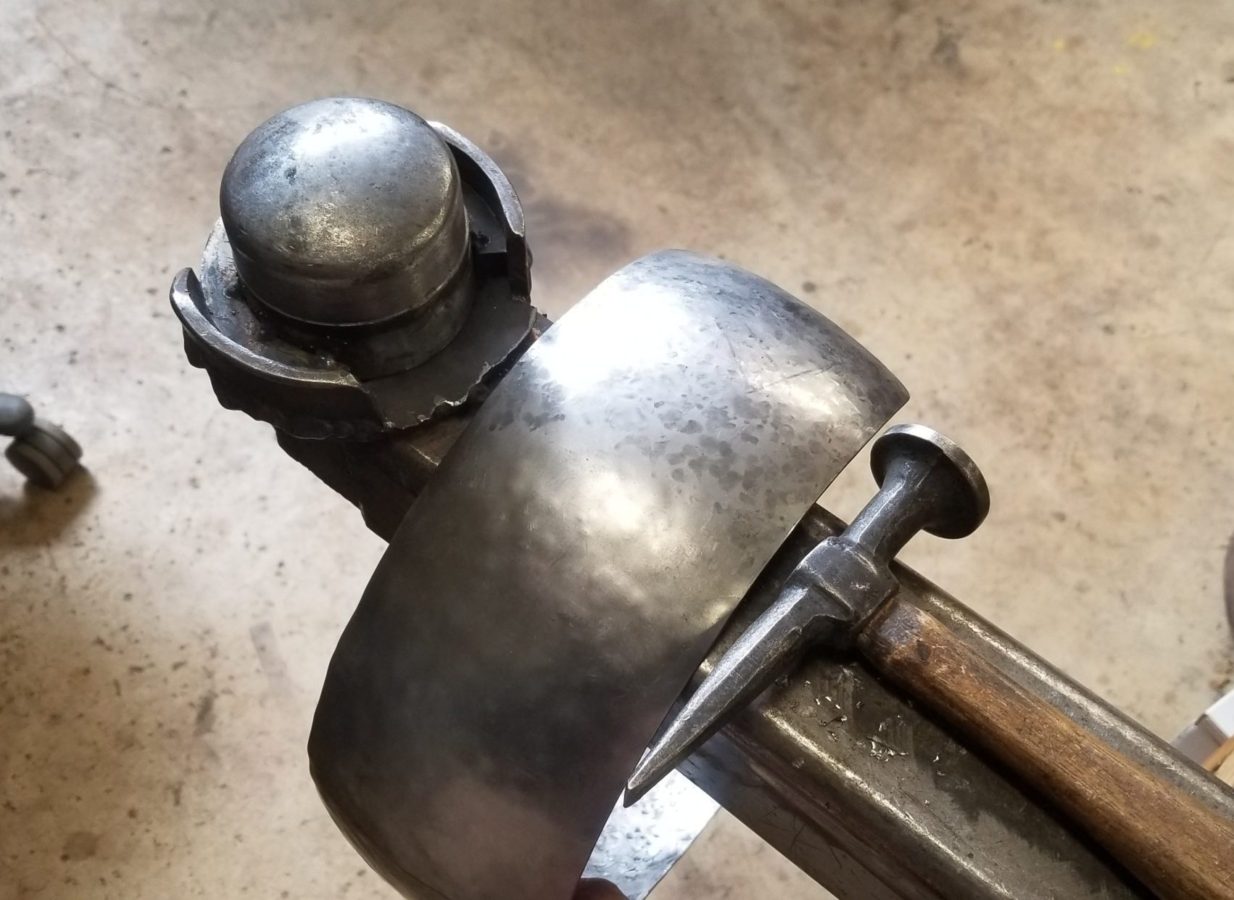
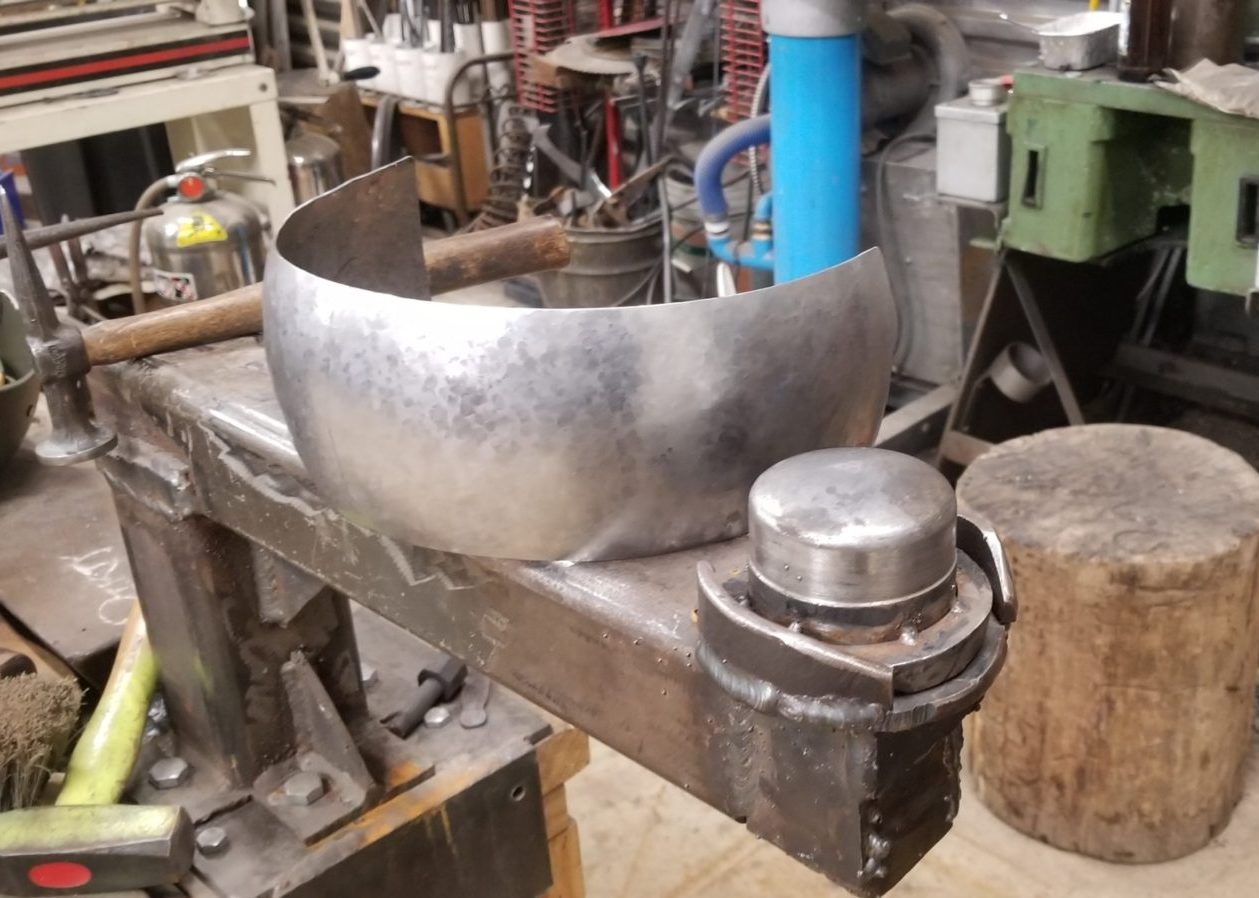
The next method is forming the curve over an object, such as a pipe or a big tree stump. I find this generally works best for smaller pieces. The main benefit of this method is the clean surface it produces. If done properly using a soft face hammer there should be no dents or dings on the surface that needs to be taken care of later. This saves a ton of time when making a many small items for something like a haidate. The difficulty lies in holding down the side of the piece that is opposite of where you are hitting. I typically hold it in a vice as seen in these diagrams/pictures:
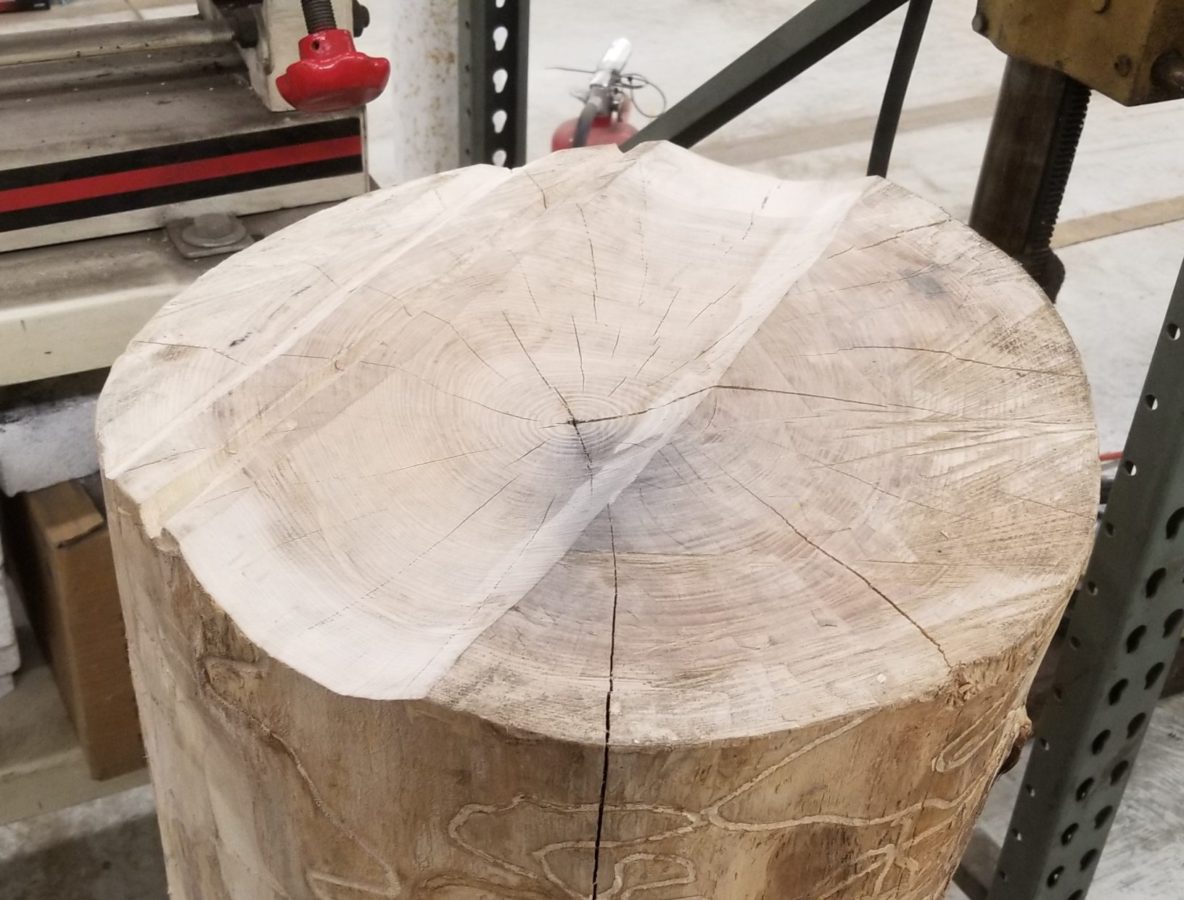
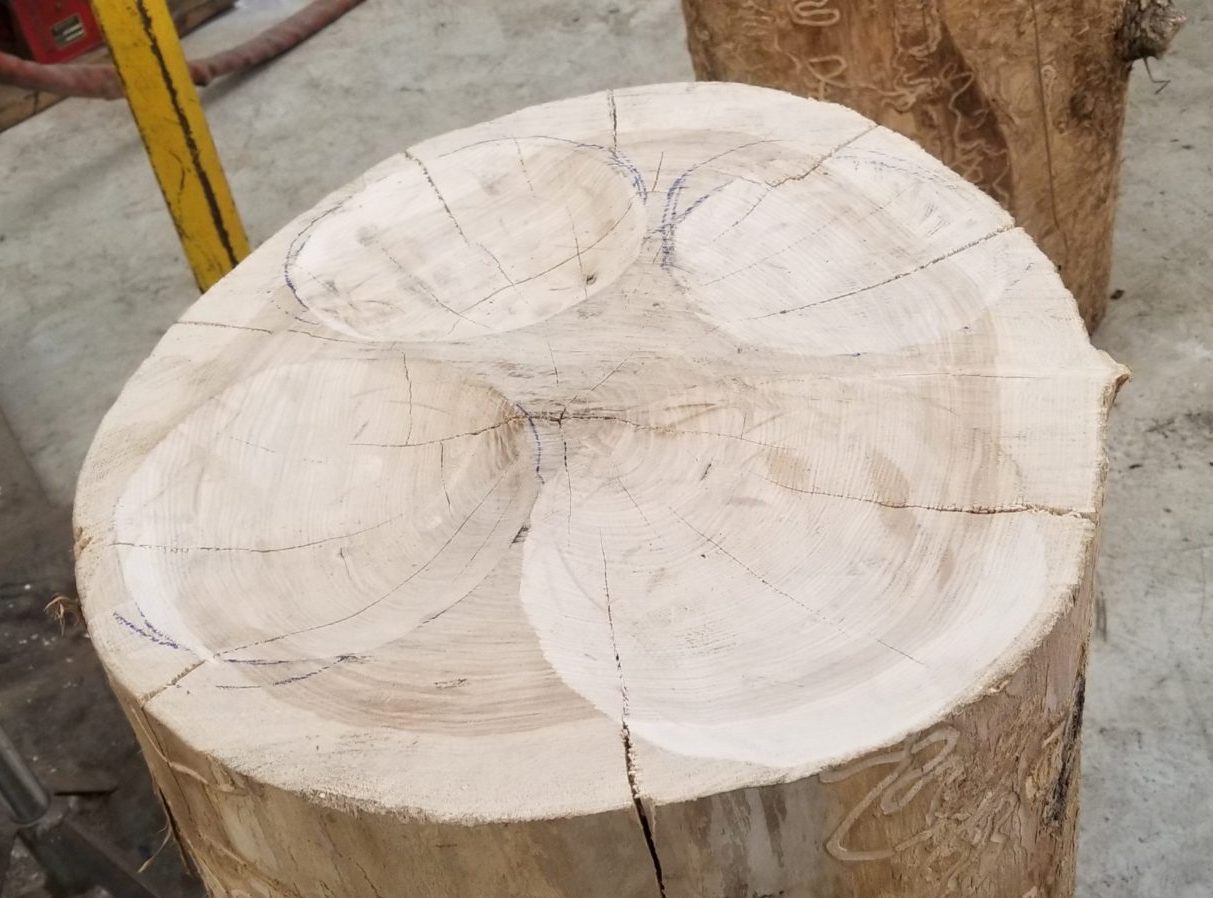
Finally there is hammering the piece into a form. This will typically be some sort of half pipe type form that is carved into a piece of wood or even just half of a large pipe. The challenge to this method obtaining and/or creating the equipment. Different diameter forms will need to be carved out as well as oval shaped hard and soft faced hammers. Depending on what equipment can be created, really smooth, and dent free curves can be achieved. Below are a free examples of the forms I use when curling pieces. A large shallow curve carved into a wooden block, a 180lbs iron swage block with a shovel form, and finally a big tree stump with 3 different channels carved into the face.
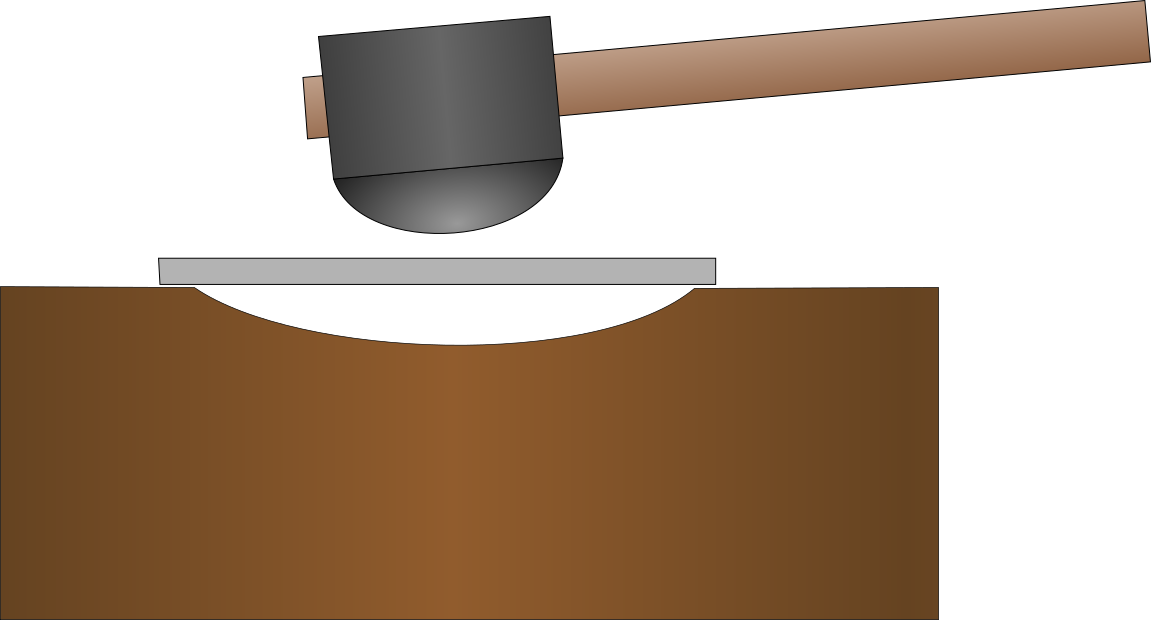
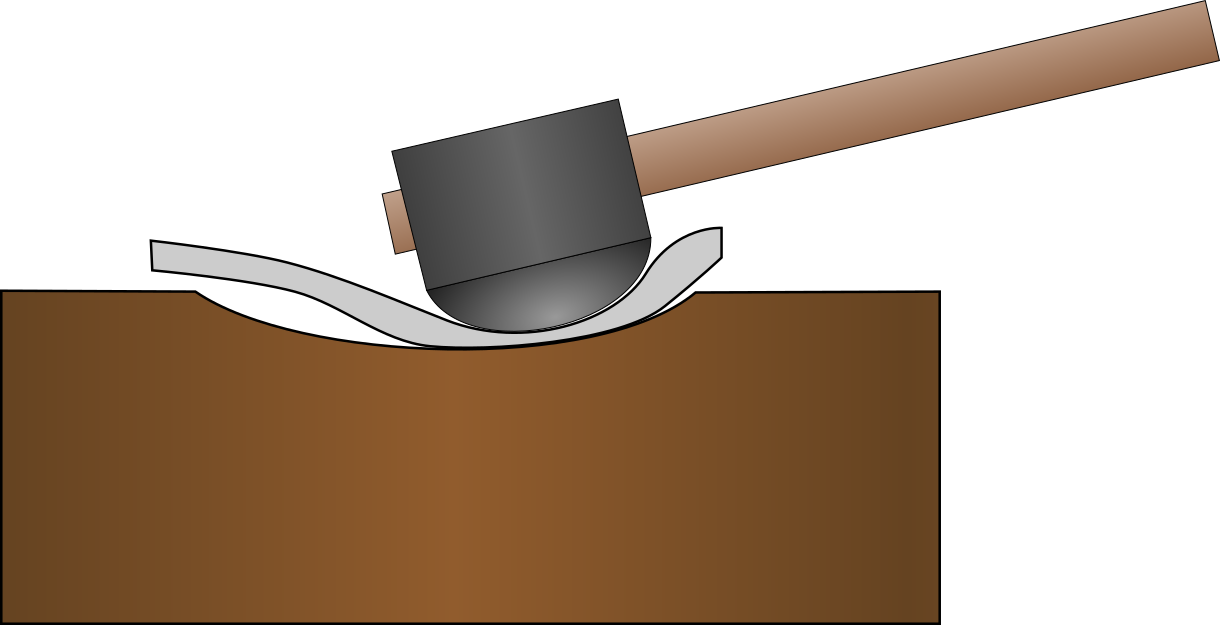
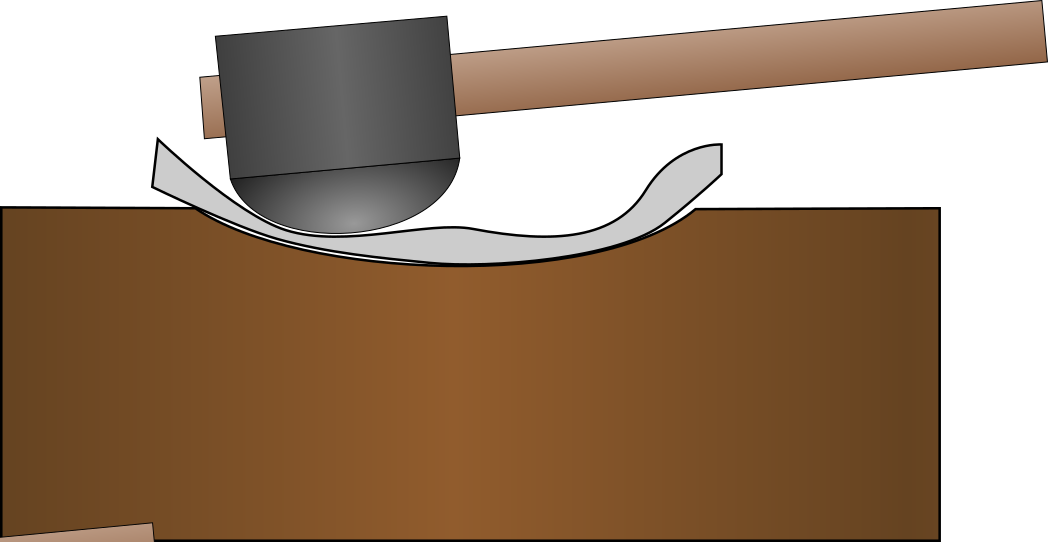
Dishing / Sinking
Dishing (or sinking) is the process of pushing metal into a depression in a hard surface to create a compound curve (demonstration). This is typically done with a large hammer that has an extremely smooth and uniformly round face and a tree stump with different bowl shapes carved into one end. The smooth hammer face and wooden “anvil” allows for the metal to be stretched without creating hard to remove imperfections in the metal surface. As seen in the demonstration video, the piece is struck firmly towards the outside edge and then it worked gradually towards the center with the hammer remaining in place and the piece being what moves. As the metal stretches and compresses, peaks and valleys will form along the outside edge, and it is important to keep these under control. Don’t be tempted to hammer them flat immediately, remember that you are working the metal into shape over many passes. Also keep in mind that in armor construction, dishing is a rough forming technique. The goal is to stretch the metal in multiple dimensions and then work it further into more specific shapes with more refined techniques as it is easy to over dish a piece. Check this video from Андрей Юманов to see what I mean.
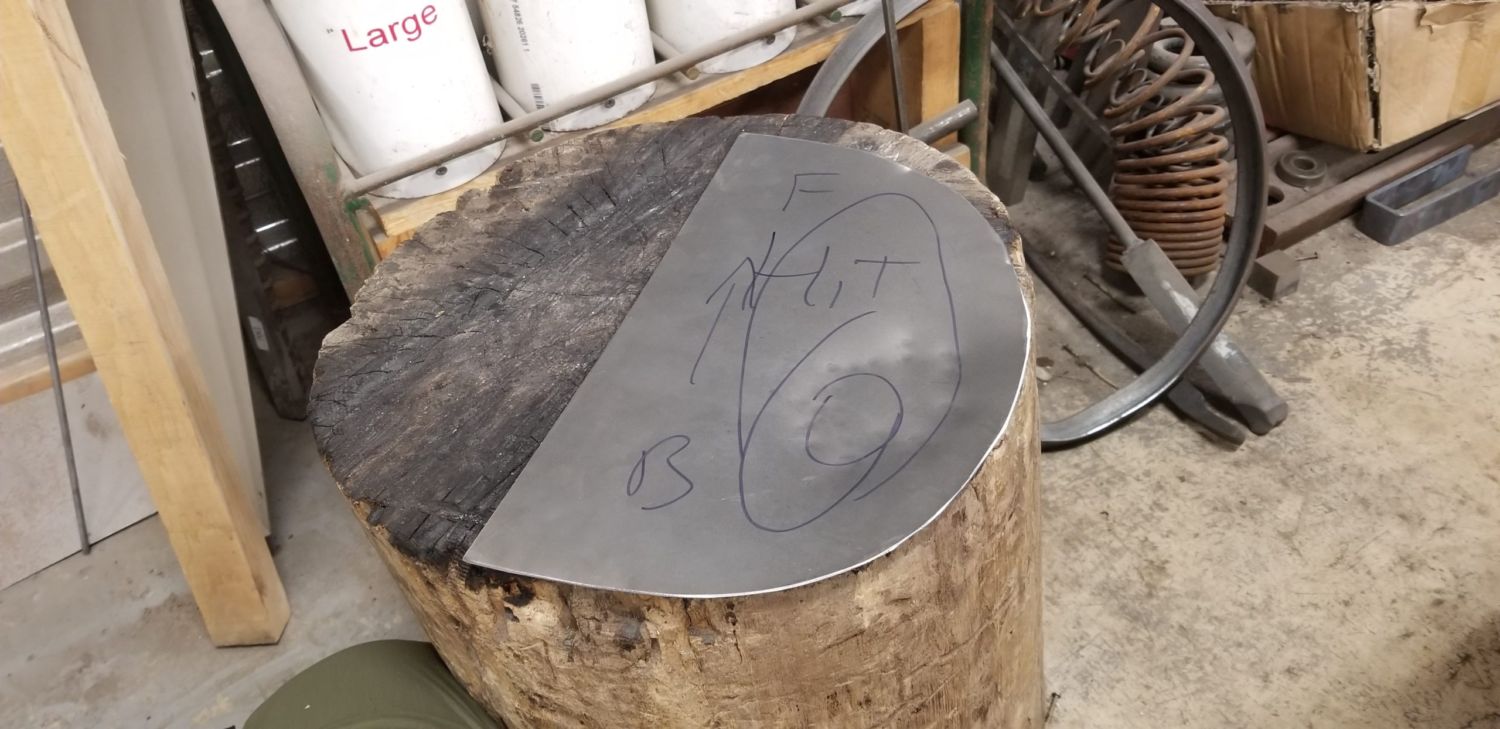
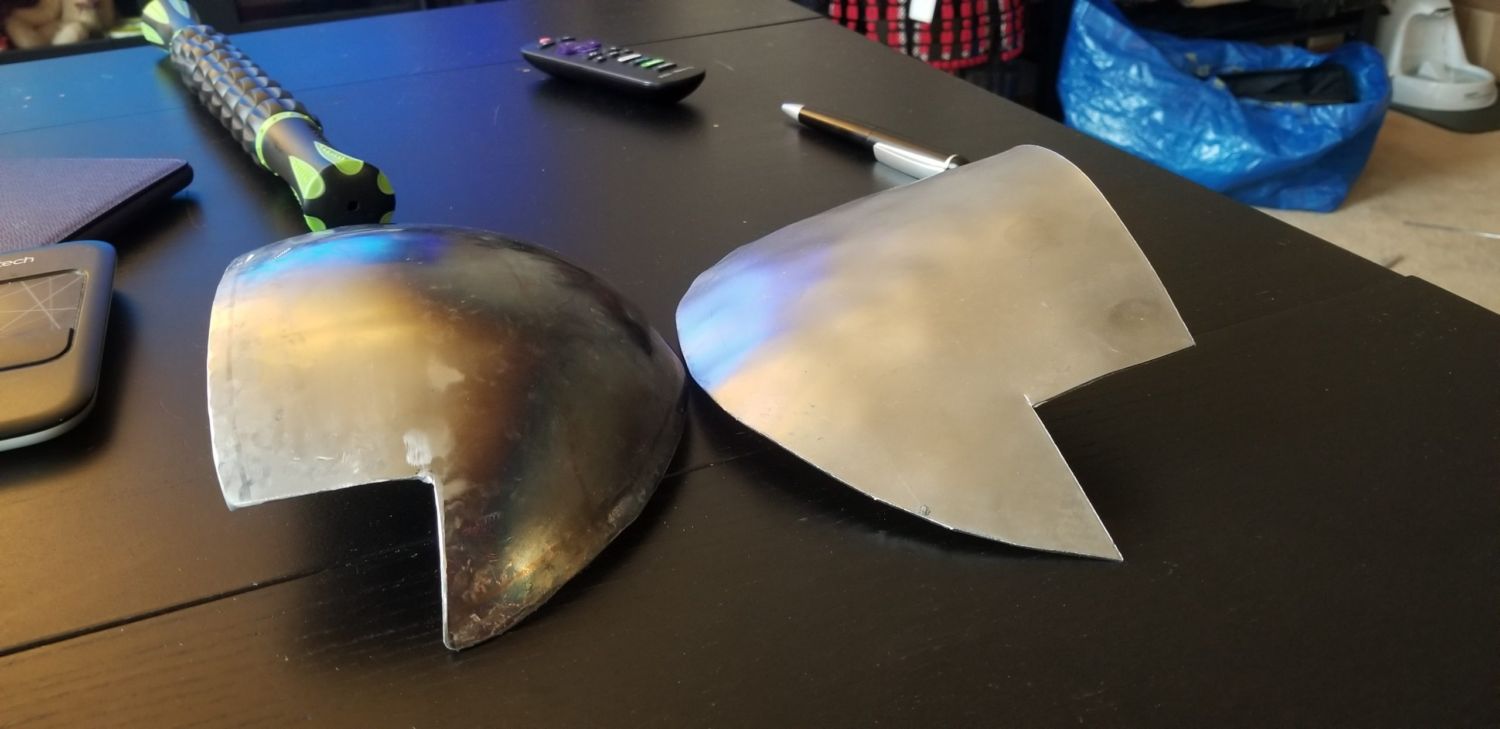
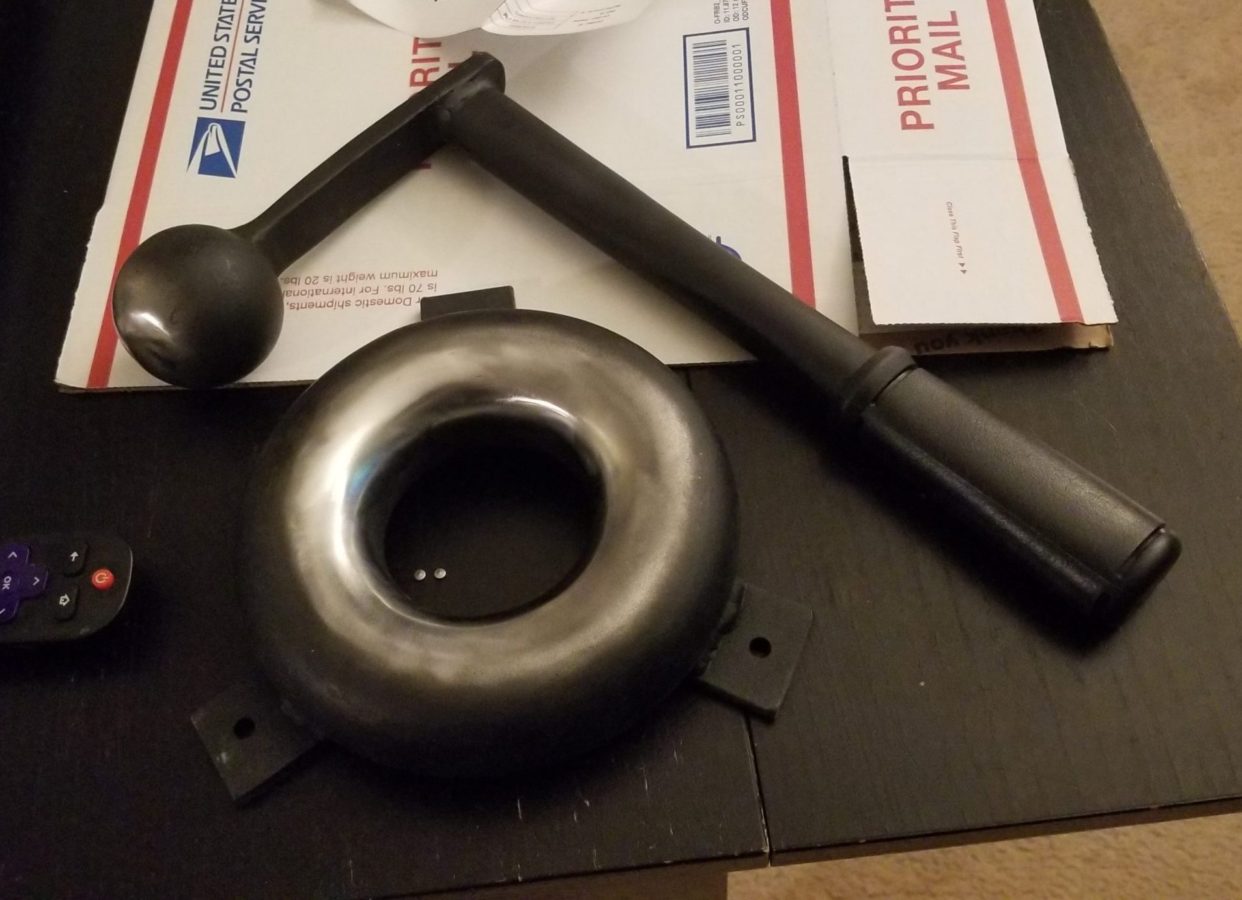
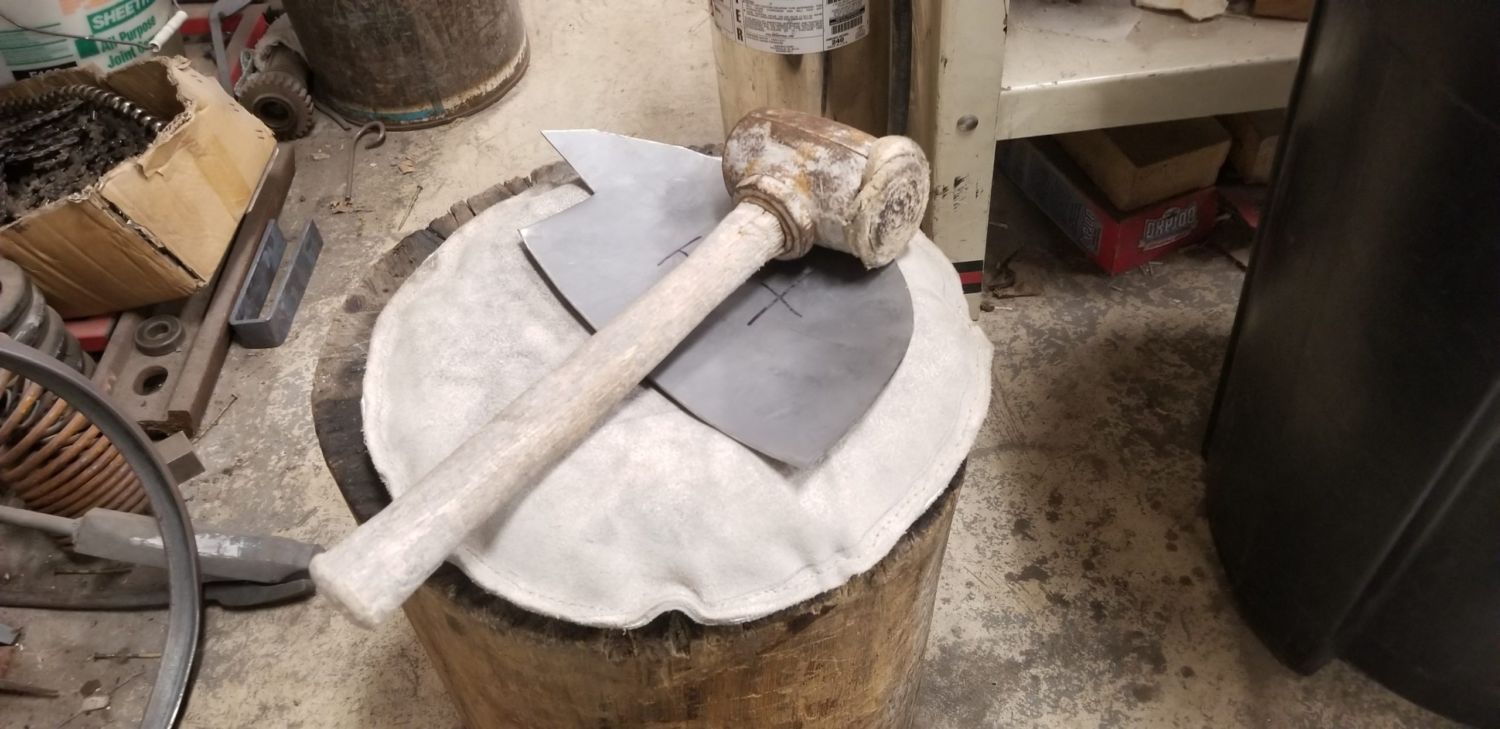
A couple of other things to note. It is very helpful to draw diagrams on your piece in areas that need to be dished more heavily than others as well as what side you should be hitting. Its a terrible feeling to be making a right and left side of a piece of armor, and accidently make two of the same. You’ll also notice a leather sandbag and a metal donut. These are alternative dishing anvils that I commonly use. The leather bag is filled with sand, and is useful in combination with a rawhide mallet for gentle dishing. The metal donut is the exact opposite; the tight fitting hammer and donut allows for deep dishing in specific places when the metal really needs to be stretched.
Planishing
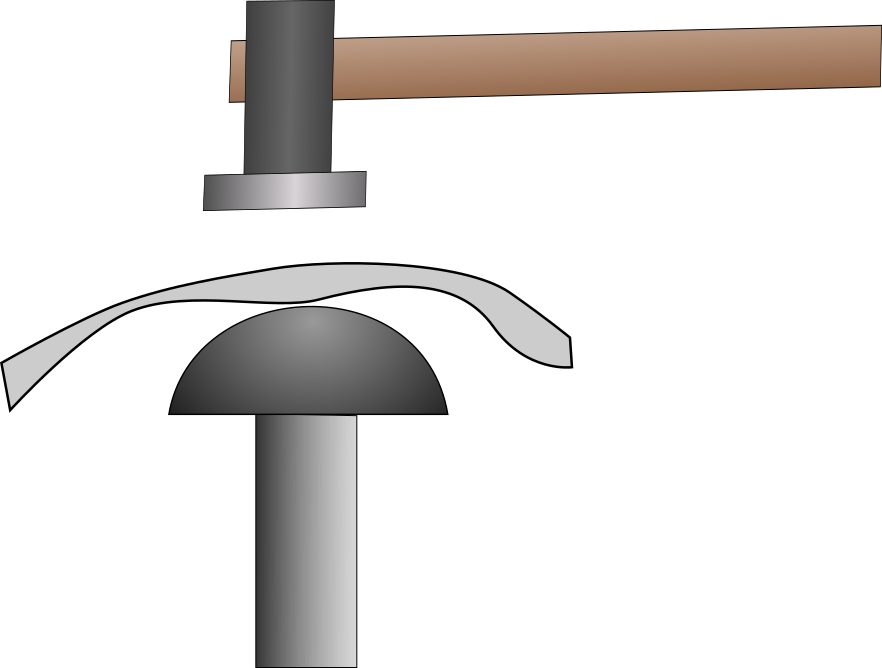
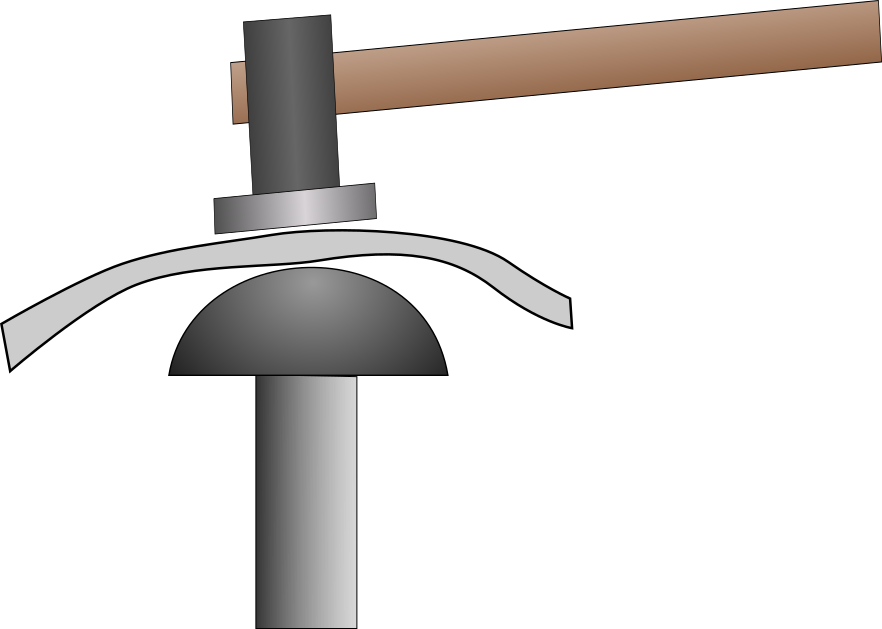
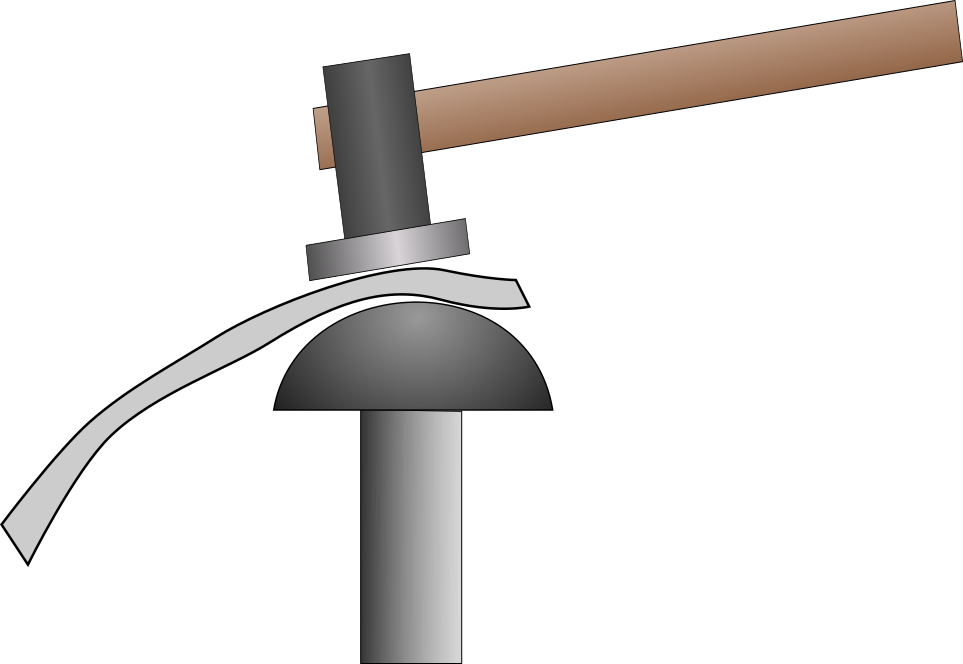
The process of planishing (demonstration) has another name that I think describes the goal more correctly; hammer polishing. After any sort of forming, the piece afterwards is going to be a mess of thicker, thinner, and generally uneven surfaces. Planishing normalizes the metal by bringing the piece back to a more uniform thickness by raising or lowering areas as well as thinning thick spots. Any method of planishing involves the core principle: some sort of hammer some sort of anvil that are opposite in shape. The round tool works the inside of the piece and the flat tool works on the outside. Pictured below are a variety of planishing tools that I use. Mostly commonly for me, a flat hammer and a round anvil.
To actually planish a piece, simply place it over your stake/anvil and give it a soft, but quite firm wack with the hammer. Always aim for the same spot on the anvil using the same amount of force, and move the piece instead of the hammer. The goal is to have the hammer, piece, and anvil all come together in a stack at the same angle. If you hit it correctly there should be a distinctly metallic ding, and a bad hit will be a much more muted thud. Remember that the goal is to normalize the piece, so aim for obvious high and low places on the piece. Due to the opposite shapes of the tools, the highs will be lowered and the lows raised ever so slightly. The piece will gradually begin to take on a polished look over a few hours of planishing.
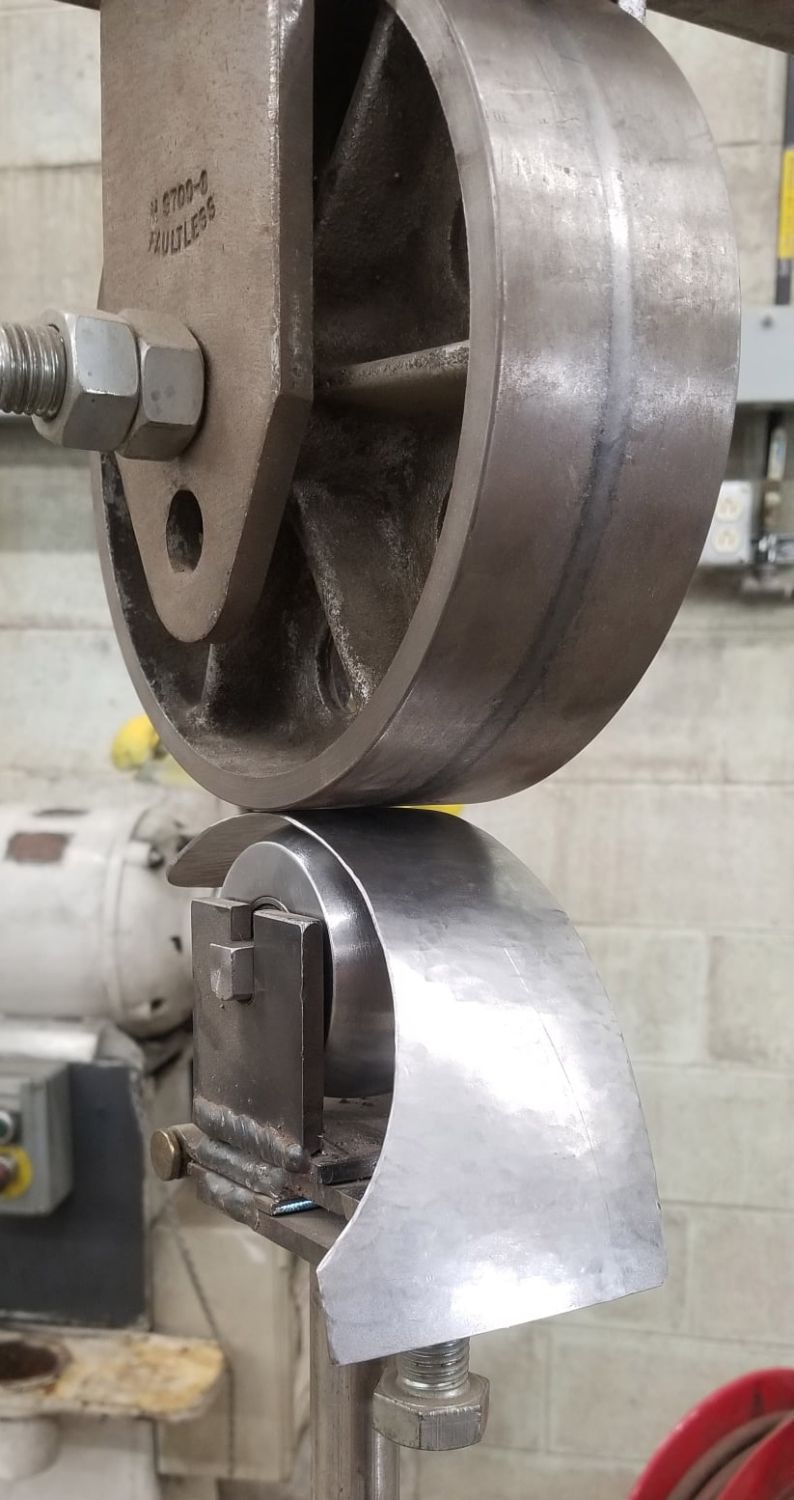
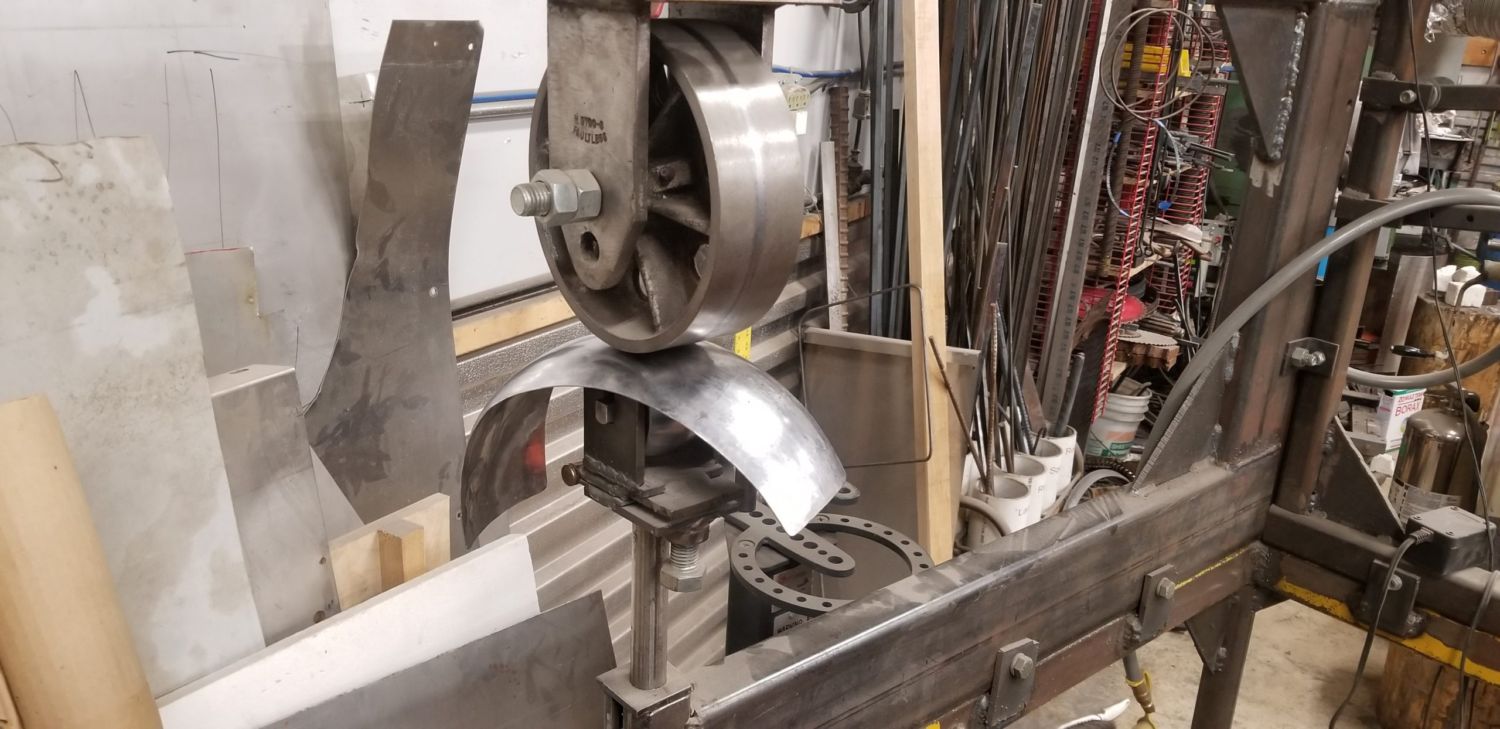
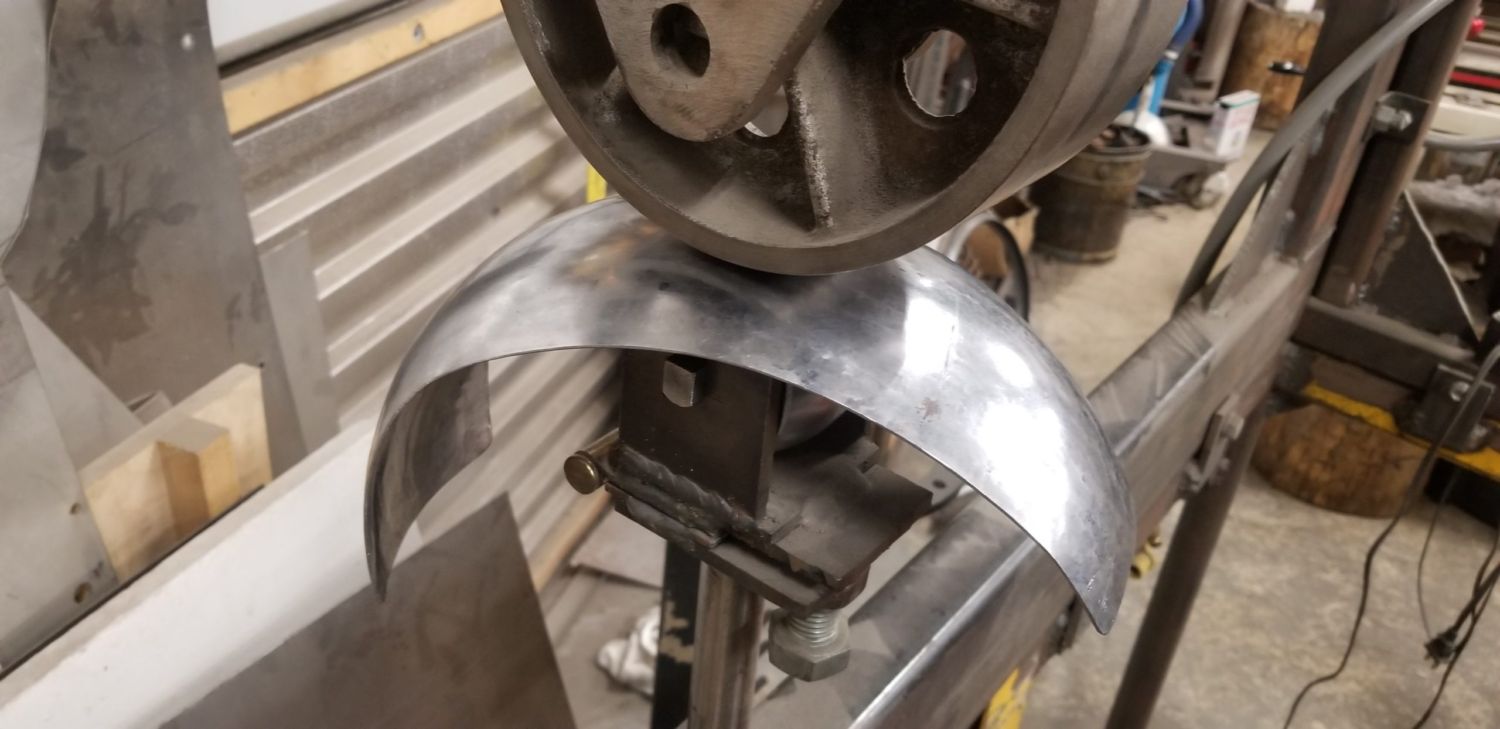
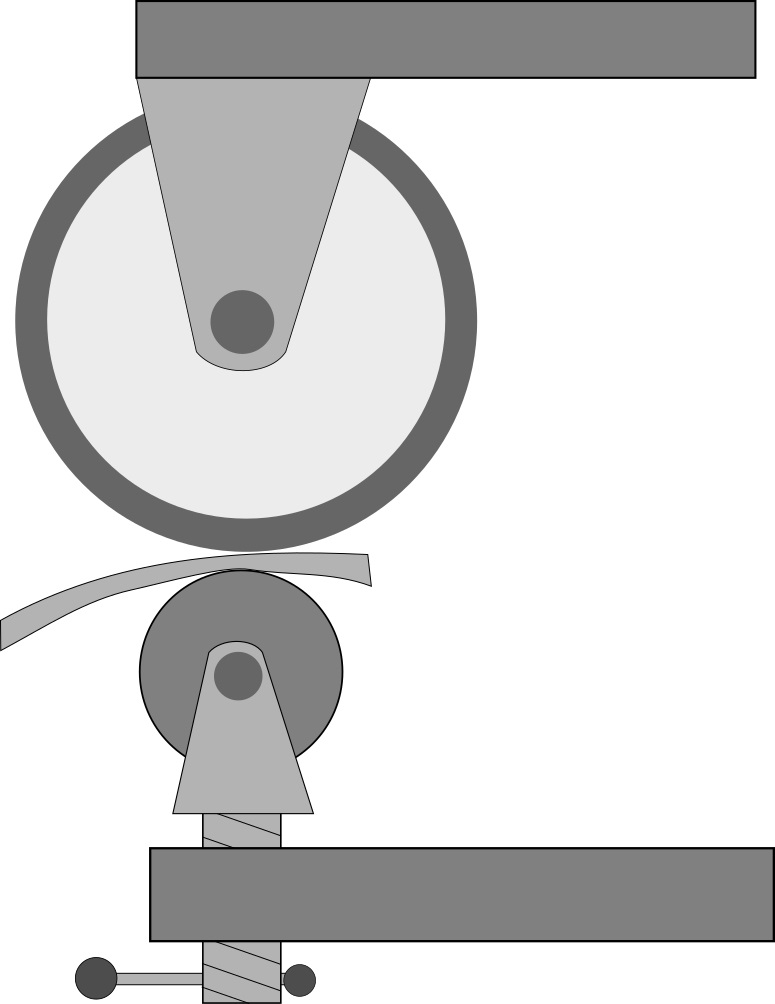
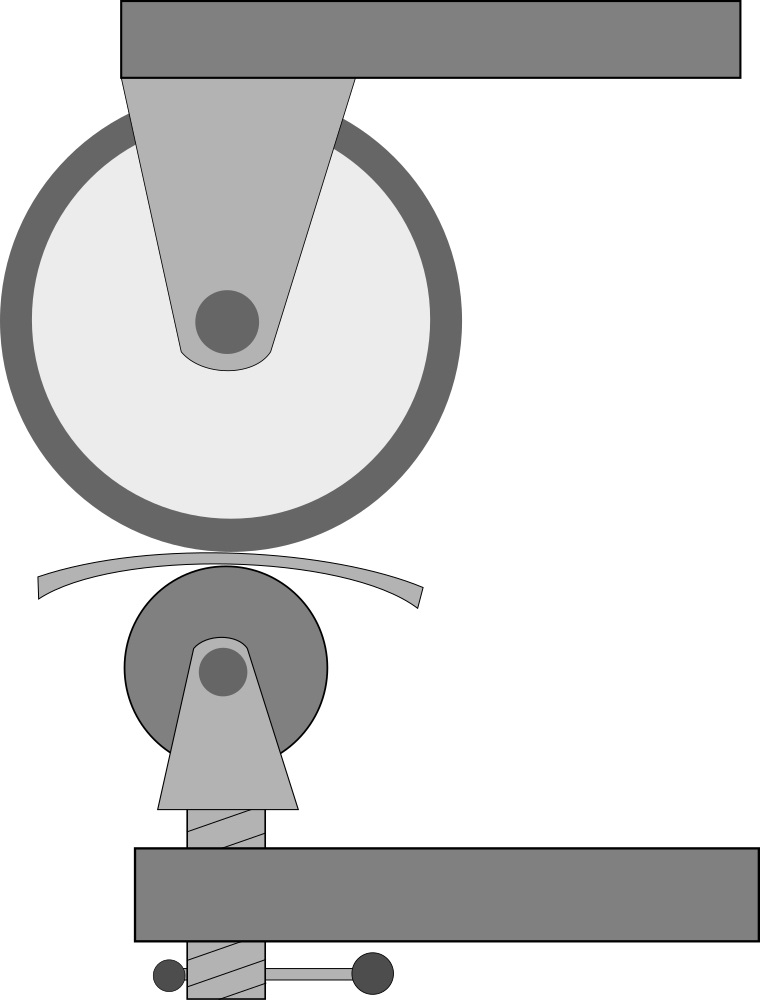
Another, a bit more advanced method, to both form and planish metal at the same time is with a tool called an english wheel, (instructional video). In the modern era the english wheel have been used primarily in the autobody industry to produce car body panels, but it was actually invented/used in the late 1500s in France in armor workshops. How it works is really straight forward; there is a flat rolling wheel at the top and a domed anvil wheel at the bottom that are held in position by a giant “C” shaped arm. The bottom anvil roller can be adjusted up and down to adjust the squeezing pressure. Metal is placed in between the rollers, the pressure is adjusted, and then the metal gets moved back and forth in a zag fashion which will gradually thin any area over which the wheels pass. It is this controlled gradual thinning of the metal that produces the smooth compound curves that the english wheel is known for.
When it comes to armor construction, I don’t really use the english wheel as the primary shaping tool, rather I find it is extremely useful for planishing. I’ll rough in the piece in a dishing form, refine it with a planishing stake and hammer, then smooth out the lumps with the english wheel. This process has to get repeated quite a few times as the smoothing process takes out some of the curve. In the third picture you can see the mirror like finish that the rough piece is taking on after a few minutes of work.
Surface and Edge Finishing
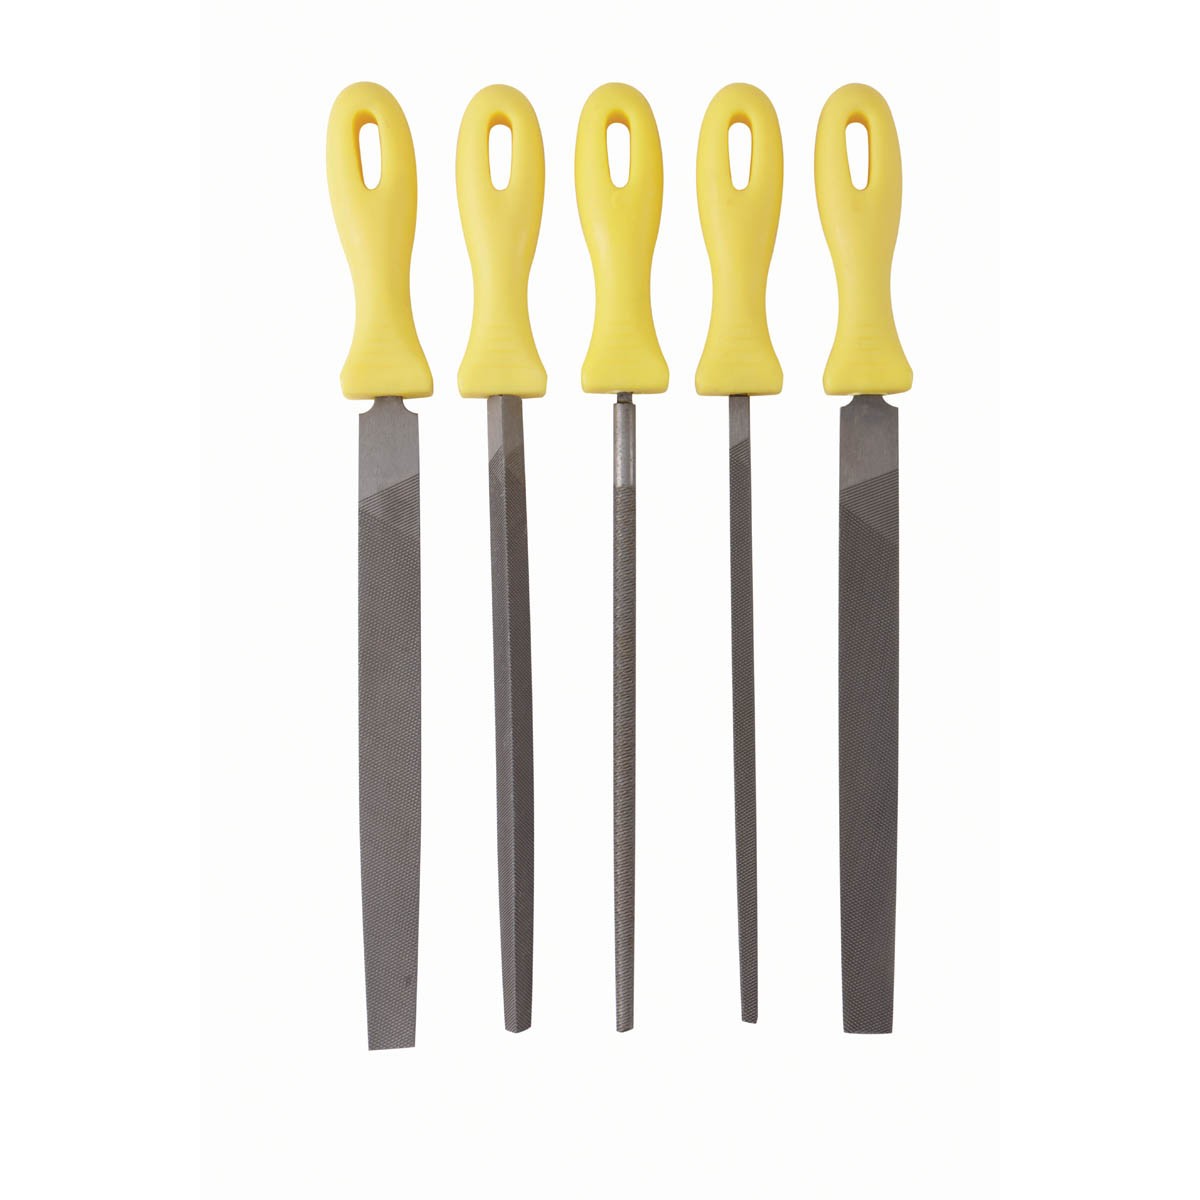
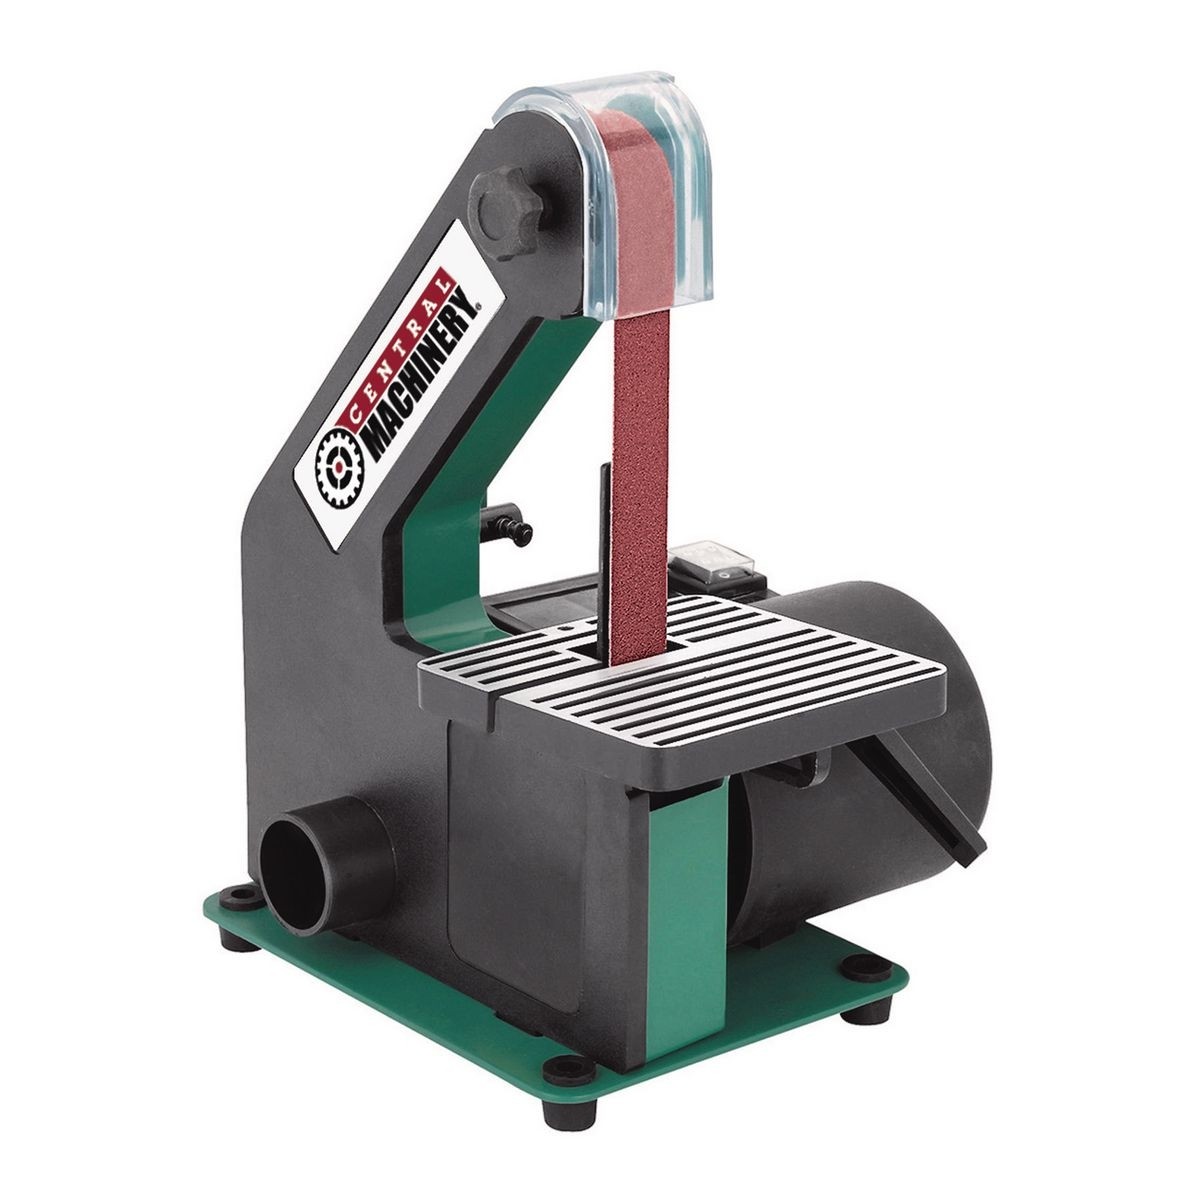
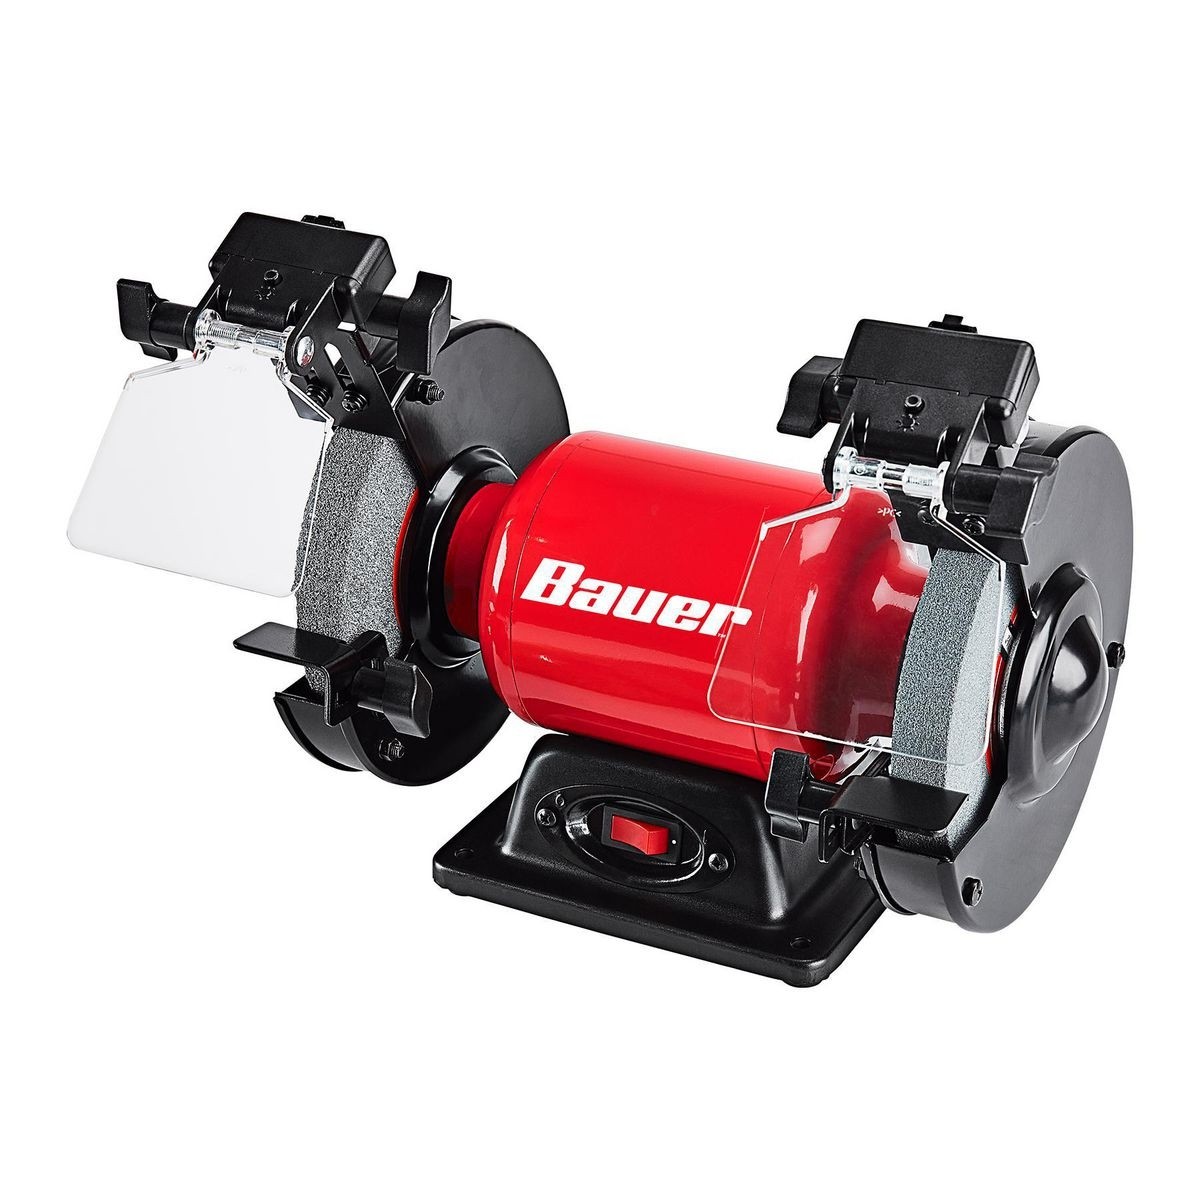
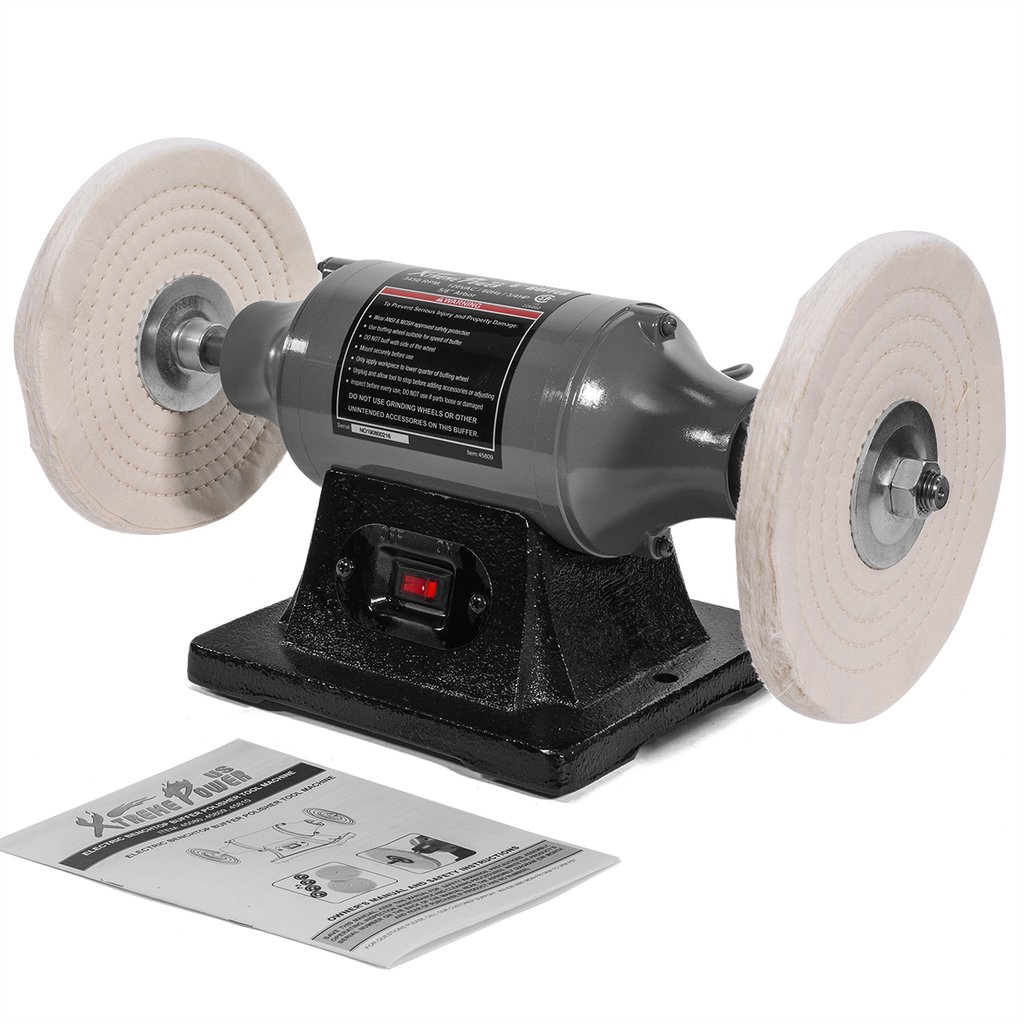
A friend of mine once said “making anything is 90% sanding” and he is absolutely correct. In Japanese armor construction, sanding and surface finish is probably the most important factor in achieving a smooth and nicely painted piece of armor. The most fundamental tool is the file. Purchase a set containing a variety of sizes, profiles, and aggressiveness. Here are some filing tips to get started. Next absolutely must have is a belt sander. They come in all shapes and sizes, but having any will see a huge return on investment. For example, after cutting any sheet metal, the resulting edge will usually be razor sharp and for safety reasons should be sanded down. A belt sander turns an multi hour long job with files into a quick 10 minute fix. Additonally, a belt sander will also help correct the shaping when your cuts are inaccurate. A bench grinder can also be used, but I find myself rarely ever using them.
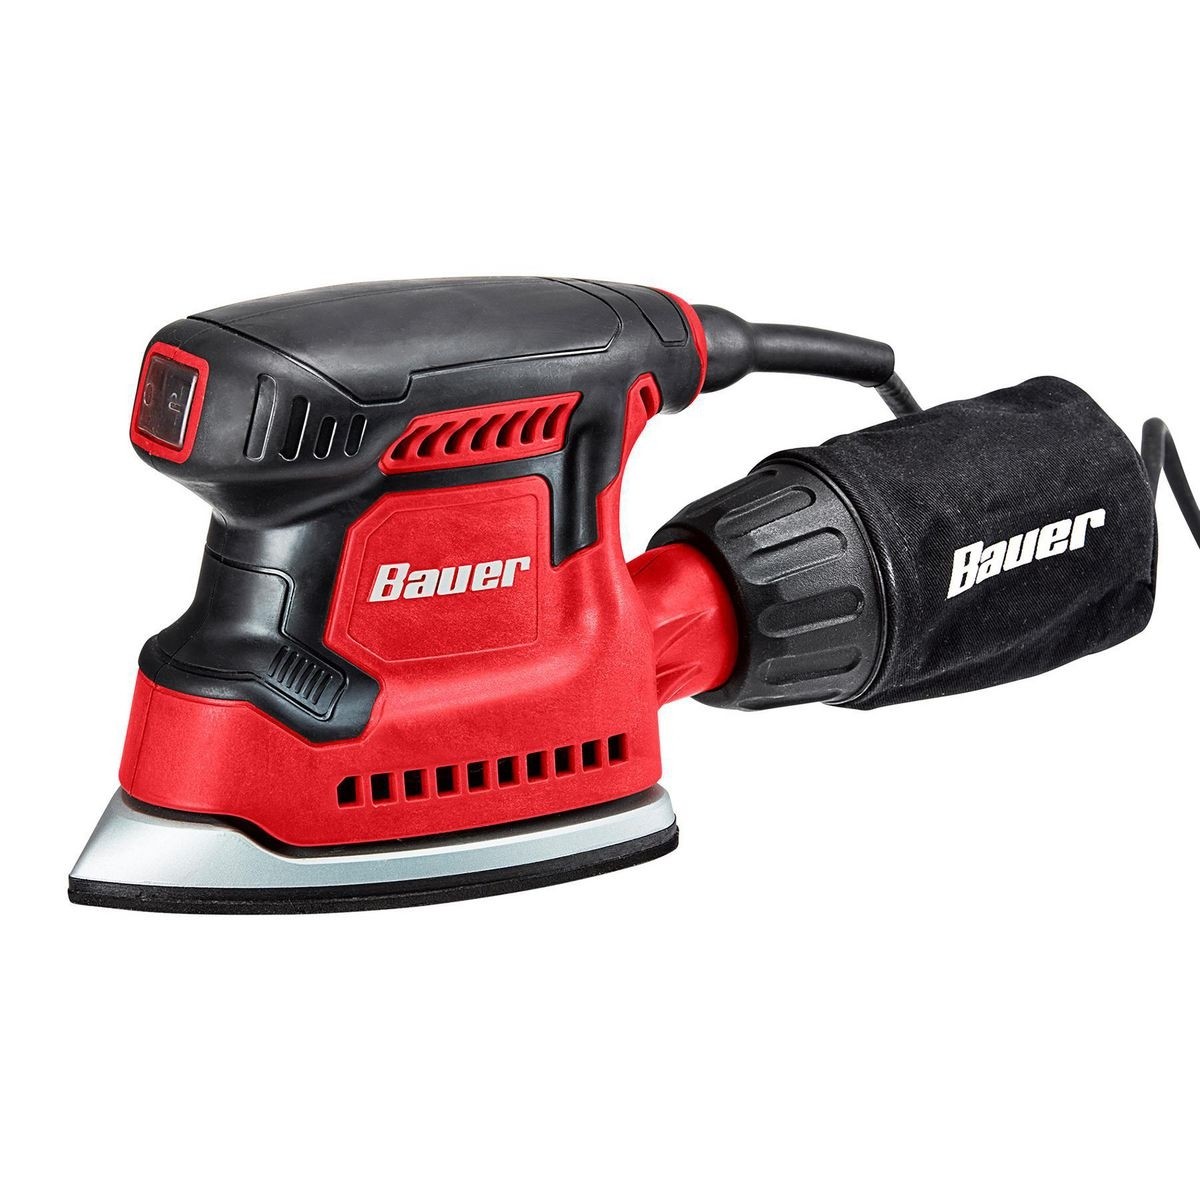
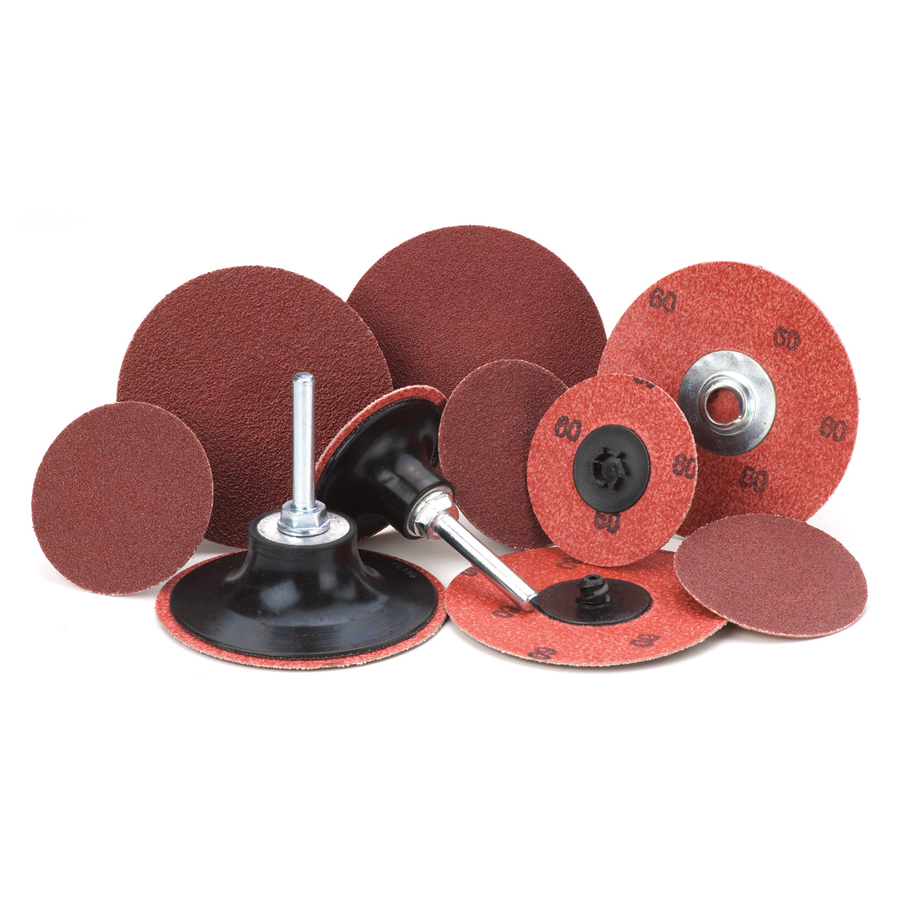
For surface finishing (removing dents, scratches, etc) I find an basic oscillating hand held sander does a sufficient job. One of my absolutely favorite methods of surface finishing metal in hard to each places are rubber backed sanding discs (more) that I use in a standard drill. The rubber edge conforms to whatever curve it encounters allowing you to remove scratches from processes like rolling edges. Finally, for a finer finish before painting, 120grit-500grit standard sandpaper or sanding sponges are the way to go.
Something less basic, but I feel is hugely beneficial to obtain one day is a slack belt sander. These sanders have a space in which the belt hangs freely with no solid surface behind it (called a platen) to push against. This allows the belt to wrap around a curved with no pressure points and remove material evenly across the entire surface. You can see one in action here. While immensely useful, the price tag is usually beyond what a beginner is wiling to invest.